如何在使用CAShapeLayer - Swift绘制的路径上标记点?
如何在使用CAShapeLayer - Swift绘制的路径上标记点?
提问于 2016-03-09 23:04:33
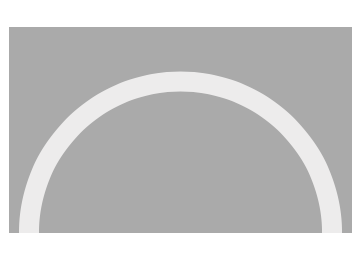
我有一个使用CAShapeLayer在UIView中绘制的自定义路径。它是半圆,上半圆,从左到右画。
下面是在UIView子类中使用的、写入的代码:
func drawSemicircle() {

        // drawing an upper half of a circle -> 180 degree to 0 degree, clockwise
        let startAngle = CGFloat(M_PI)
        let endAngle = CGFloat(0.0)
        let centerPoint = CGPointMake(CGRectGetWidth(frame)/2 , CGRectGetHeight(frame))

        // path set here
        let semirCircleLayer = CAShapeLayer()
        let semirCirclePath = UIBezierPath(arcCenter:centerPoint, radius: CGRectGetWidth(frame)/2 - 20.0 , startAngle:startAngle, endAngle:endAngle, clockwise: true)
        semirCircleLayer.path = semirCirclePath.CGPath

        // layer customisation
        semirCircleLayer.fillColor = UIColor.clearColor().CGColor
        semirCircleLayer.strokeColor = UIColor(red: 237.0/255.0, green: 236.0/255.0, blue: 236.0/255.0, alpha: 1.0).CGColor
        semirCircleLayer.lineWidth = 20.0
        semirCircleLayer.lineCap = kCALineCapButt
        layer.addSublayer(semirCircleLayer)
    }
当前路径如下所示:
我试着实现的是在条形.Like上的一些点标记一个模拟时钟的毕业+数字,但没有那么复杂。只需在任何进度水平上标记1点。最后一个输出,如下所示:

能帮我个忙吗?
回答 1
Stack Overflow用户
发布于 2016-03-11 11:22:20
您将希望在毕业时使用另一个CAShapeLayer,在毕业典礼结束时使用一个CATextLayer。
我建议您使用100%的图层方法来最适合您的现有代码,而不是像my answer here那样进行核心图形绘制。
像这样的事情应该能起作用:
func drawSemicircle() {

    // drawing an upper half of a circle -> 180 degree to 0 degree, clockwise
    let startAngle = CGFloat(M_PI)
    let endAngle = CGFloat(0.0)
    let centerPoint = CGPoint(x: CGRectGetWidth(frame)*0.5 , y: CGRectGetHeight(frame))
    let radius = frame.size.width*0.5 - 80.0 // radius of your arc

    // path set here
    let semiCircleLayer = CAShapeLayer()
    semiCircleLayer.frame = bounds // requried for layer calculations
    let semiCirclePath = UIBezierPath(arcCenter:centerPoint, radius:radius, startAngle:startAngle, endAngle:endAngle, clockwise: true)
    semiCircleLayer.path = semiCirclePath.CGPath

    // layer customisation
    semiCircleLayer.fillColor = UIColor.clearColor().CGColor
    semiCircleLayer.strokeColor = UIColor(red: 237.0/255.0, green: 236.0/255.0, blue: 236.0/255.0, alpha: 1.0).CGColor
    semiCircleLayer.lineWidth = 20.0
    semiCircleLayer.lineCap = kCALineCapButt
    layer.addSublayer(semiCircleLayer)


    // draw graduation (cue the wall of code!)

    let graduationLayer = CAShapeLayer() // the graduation layer that'll display the graduation
    graduationLayer.frame = semiCircleLayer.bounds

    let graduationWidth = CGFloat(4.0) // the width of the graduation
    let graduationLength = CGFloat(50.0) // the length of the graduation
    let graduationColor = UIColor.redColor() // the color of both the graduation line and text

    let startGradRad = radius-semiCircleLayer.lineWidth*0.5 // the starting radius of the graduation
    let endGradRad = startGradRad+graduationLength // the ending radius of the graduation

    let graduationAngle = CGFloat(M_PI*0.79) // 21% along the arc from the left (0 degrees coresponds to the right hand side of the circle, with the positive angle direction going anti-clocwise (much like a unit circle in maths), so we define 79% along the arc, from the right hand side)

    // the starting point of the graduation line. the angles are negative as the arc is effectively drawn upside-down in the UIKit coordinate system.
    let startGradPoint = CGPoint(x: cos(-graduationAngle)*startGradRad+centerPoint.x, y: sin(-graduationAngle)*startGradRad+centerPoint.y)
    let endGradPoint = CGPoint(x: cos(-graduationAngle)*endGradRad+centerPoint.x, y: sin(-graduationAngle)*endGradRad+centerPoint.y)

    // the path for the graduation line
    let graduationPath = UIBezierPath()
    graduationPath.moveToPoint(startGradPoint) // start point
    graduationPath.addLineToPoint(endGradPoint) // end point

    graduationLayer.path = graduationPath.CGPath // add path to the graduation shape layer

    // configure stroking options
    graduationLayer.fillColor = UIColor.clearColor().CGColor
    graduationLayer.strokeColor = graduationColor.CGColor
    graduationLayer.lineWidth = graduationWidth

    // add to semi-circle layer
    semiCircleLayer.addSublayer(graduationLayer)

    // the font of the text to render at the end of the graduation
    let textFont = UIFont.systemFontOfSize(30)

    // the text to render at the end of the graduation - do you custom value logic here
    let str : NSString = "value"

    // default paragraph style
    let paragraphStyle = NSParagraphStyle()

    // the text attributes dictionary. used to obtain a size of the drawn text in order to calculate its frame
    let textAttributes = [NSParagraphStyleAttributeName:paragraphStyle, NSFontAttributeName:textFont]

    // size of the rendered text
    let textSize = str.sizeWithAttributes(textAttributes)

    let xOffset = abs(cos(graduationAngle))*textSize.width*0.5 // the x-offset of the text from the end of the graduation line
    let yOffset = abs(sin(graduationAngle))*textSize.height*0.5 // the y-offset of the text from the end of the graduation line

    /// the padding between the graduation line and the text
    let graduationTextPadding = CGFloat(5.0)

    // bit of pythagorus to determine how far away the center of the text lies from the end of the graduation line. multiplying the values together is cheaper than using pow. the text padding is added onto it.
    let textOffset = sqrt(xOffset*xOffset+yOffset*yOffset)+graduationTextPadding

    // the center of the text to render
    let textCenter = CGPoint(x: cos(-graduationAngle)*textOffset+endGradPoint.x, y: sin(-graduationAngle)*textOffset+endGradPoint.y)

    // the frame of the text to render
    let textRect = CGRect(x: textCenter.x-textSize.width*0.5, y: textCenter.y-textSize.height*0.5, width: textSize.width, height: textSize.height)

    let textLayer = CATextLayer()
    textLayer.contentsScale = UIScreen.mainScreen().scale // to ensure the text is rendered at the screen scale
    textLayer.frame = textRect
    textLayer.string = str
    textLayer.font = textFont
    textLayer.fontSize = textFont.pointSize // required as CATextLayer ignores the font size of the font you pass
    textLayer.foregroundColor = graduationColor.CGColor // color of text
    graduationLayer.addSublayer(textLayer)
}
输出:

这里有相当多的代码,因为您必须做一些额外的逻辑来计算CATextLayer的大小。您可以通过使用UILabel简化这一点,因为您可以使用sizeToFit来计算大小,但是这可能会使层层次结构复杂化。
我已经尽力解释了每一行代码--但是如果你还有问题,我会很乐意回答它们的!
此外,如果您重新构造代码,您可以很容易地考虑到分级角度,以及从类外部更改其他变量。我在下面的完整项目中提供了一个这方面的示例。
页面原文内容由Stack Overflow提供。腾讯云小微IT领域专用引擎提供翻译支持
原文链接:
https://stackoverflow.com/questions/35909748
复制相关文章


相似问题
Python3,可除以3,typeError
Python3: TypeError:“TypeError”对象不可订阅
安装PyGraphviz时出错(Mac、Anaconda)
PySide & Python3: TypeError on QAction
Python3 Runserver TypeError {newbie}
添加站长 进交流群
领取专属 10元无门槛券
AI混元助手 在线答疑

关注 腾讯云开发者公众号
洞察 腾讯核心技术
剖析业界实践案例

腾讯云开发者
