CG-Assignment1


计算机图形学作业1
本文为计算机图形学作业2报告, 为本人计算机图形学课程作业, 仅供参考, 未经允许不得转载, 抄袭.
1.引言
本次项目完成作业1,实现了对obj文件的加载, 并对模型进行键盘和鼠标控制
具体实现如下:
- 实现obj文件的加载
- 对模型加键盘控制,通过键盘可以实现模型的缩放、平移和旋转。 例如,按压右/左方向键,模型可以向右/左移动。具体按键和其对应的功能自行设定,但需要在报告中详细给出文字说明。
- 对相机加鼠标控制,主要包含以下两个功能: a. 模型本身保持固定,拖动鼠标左键实现视角 (lookat matrix)的改变 b. 模型本身保持固定,拖动鼠标右键实现视点(viewpoint position)的移动
2. 主体介绍
2.1 程序简介
编程环境
MacOS,C++11,IDE: CLion,cmake,使用OpenGL,Glad,GLFW3.3.8,glm0.9.9.1以及Assimp
文件结构
Computer_Graphics_Assign1
│
├── model_loading.cpp
├── 1.model_loading.fs
├── 1.model_loading.vs
├── CMakeLists.txt
├──
├── OBJ_Files
│   ├── airboat.obj
│   └── bunny.obj
│
├── includes
│   ├── camera.h
│ 	├── model.h
│		├── shader.h
│   └── mesh.h
└── ...Glad & Glm & cmake-build-debug
2.2 算法
在这一部分需要描述你的项目实现过程中用了哪些算法,需要你从算法背后的原理入手结合自己的项目进行描述,切忌段落式的粘贴代码,如果是自己写的算法,进行适当的算法复杂度分析。 示例:a) Lambert 漫反射光照模型 b) 正投影相机 c) Phong光照模型 d) 一些图形的绘制举例 e) 碰撞测试特例算法 注:一定要结合自己的项目去写这一部分,落到实处,切忌直接从网上直接粘贴理论知识。
2.2.1 OBJ文件的加载
首先是对于OBJ文件的加载,我使用了一个非常流行的模型导入库——Assimp
Assimp能够导入很多种不同的模型文件格式,它会将所有的模型数据加载至Assimp的通用数据结构中。当Assimp加载完模型之后,就能够从Assimp的数据结构中提取所需的所有数据。
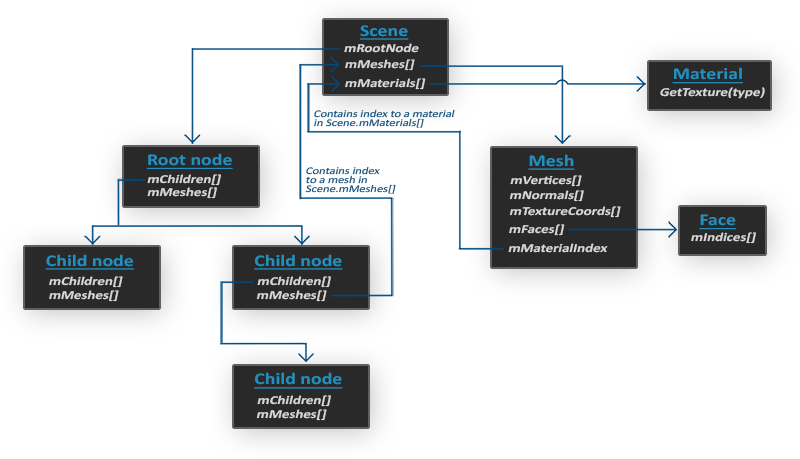
- 所有的场景/模型数据都包含在Scene对象
- 一个Mesh对象本身包含了渲染所需要的所有相关数据,像是顶点位置、法向量、纹理坐标、面(Face)和物体的材质。
- 最终仍要将这些数据转换为OpenGL能够理解的格式,才能渲染这个物体
2.2.2 键盘鼠标控制操作
详细思想和代码实现见Camera和Model_loading处
2.3 实现细节
在这一部分,将自己的项目拆解成各个部分进行说明。切忌段落式的粘贴代码。 第二章应占整体篇幅的40%。
2.3.1 Mesh网格
定义一个顶点结构体
struct Vertex {
    // position
    glm::vec3 Position;
    // normal 法线
    glm::vec3 Normal;
    // texCoords
    glm::vec2 TexCoords;
    // tangent 切线
    glm::vec3 Tangent;
    // bitangent 双切线
    glm::vec3 Bitangent;
    //bone indexes which will influence this vertex
    int m_BoneIDs[MAX_BONE_INFLUENCE];
    //weights from each bone
    float m_Weights[MAX_BONE_INFLUENCE];
};
定义网格类
构造函数导入导入数据,调用setupMesh()方法,在setupMesh()函数中初始化缓冲,并最终使用Draw()函数来绘制网格
构造函数
Mesh(vector<Vertex> vertices, vector<unsigned int> indices)
   {
       this->vertices = vertices;
       this->indices = indices;
       setupMesh();
}其中包含setupMesh()
void setupMesh()
    {
        // create buffers/arrays
        glGenVertexArrays(1, &VAO);
        glGenBuffers(1, &VBO);
        glGenBuffers(1, &EBO);

        glBindVertexArray(VAO);
        // load data into vertex buffers
        glBindBuffer(GL_ARRAY_BUFFER, VBO);
        glBufferData(GL_ARRAY_BUFFER, vertices.size() * sizeof(Vertex), &vertices[0], GL_STATIC_DRAW);

        glBindBuffer(GL_ELEMENT_ARRAY_BUFFER, EBO);
        glBufferData(GL_ELEMENT_ARRAY_BUFFER, indices.size() * sizeof(unsigned int), &indices[0], GL_STATIC_DRAW);

        // set the vertex attribute pointers
        // vertex Positions
        glEnableVertexAttribArray(0);
        glVertexAttribPointer(0, 3, GL_FLOAT, GL_FALSE, sizeof(Vertex), (void*)0);
        // vertex normals
        glEnableVertexAttribArray(1);
        glVertexAttribPointer(1, 3, GL_FLOAT, GL_FALSE, sizeof(Vertex), (void*)offsetof(Vertex, Normal));
        // vertex tangent
        glEnableVertexAttribArray(3);
        glVertexAttribPointer(3, 3, GL_FLOAT, GL_FALSE, sizeof(Vertex), (void*)offsetof(Vertex, Tangent));
        // vertex bitangent
        glEnableVertexAttribArray(4);
        glVertexAttribPointer(4, 3, GL_FLOAT, GL_FALSE, sizeof(Vertex), (void*)offsetof(Vertex, Bitangent));
        // ids
        glEnableVertexAttribArray(5);
        glVertexAttribIPointer(5, 4, GL_INT, sizeof(Vertex), (void*)offsetof(Vertex, m_BoneIDs));
        // weights
        glEnableVertexAttribArray(6);
        glVertexAttribPointer(6, 4, GL_FLOAT, GL_FALSE, sizeof(Vertex), (void*)offsetof(Vertex, m_Weights));
        glBindVertexArray(0);
}以及提供Draw(),绘制每个mesh
void Draw(Shader &shader)
    {
        // draw mesh
        glBindVertexArray(VAO);
        glDrawElements(GL_TRIANGLES, static_cast<unsigned int>(indices.size()), GL_UNSIGNED_INT, 0);
        glBindVertexArray(0);

    }
2.3.2 Model模型
定义Model类
class Model
{
    public:
        vector<Mesh> meshes;
   			string directory;
  			// 构造函数
        Model(char *path)
        {
            loadModel(path);
        }
        void Draw(Shader shader);
    private:
        void loadModel(string path);
        void processNode(aiNode *node, const aiScene *scene);
        Mesh processMesh(aiMesh *mesh, const aiScene *scene);
        vector<Texture> loadMaterialTextures(aiMaterial *mat, aiTextureType type,
                                             string typeName);
};
构造函数
其中包含了一个Mesh对象的vector,构造函数包含loadModel()函数和draw()函数
draw()函数遍历了所有网格,并调用它们各自的Draw函数
void Draw(Shader shader)
{
    for(unsigned int i = 0; i < meshes.size(); i++)
        meshes[i].Draw(shader);
}loadModel()函数,需要传入一个文件路径path,之后使用Assimp来加载模型至Assimp的一个叫做scene的数据结构中
#include <assimp/Importer.hpp>
#include <assimp/scene.h>
#include <assimp/postprocess.h>

// loadModel
void loadModel(string path)
{
  	// Assimp抽象掉了加载不同文件格式的所有技术细节,只需要一行代码就能完成所有的工作
		// 声明了Assimp命名空间内的一个Importer,之后调用了它的ReadFile函数
    Assimp::Importer import;
    const aiScene *scene = import.ReadFile(path, aiProcess_Triangulate | aiProcess_FlipUVs);

    if(!scene || scene->mFlags & AI_SCENE_FLAGS_INCOMPLETE || !scene->mRootNode)
    {
        cout << "ERROR::ASSIMP::" << import.GetErrorString() << endl;
        return;
    }
    directory = path.substr(0, path.find_last_of('/'));

    processNode(scene->mRootNode, scene);
}

// processNode
void processNode(aiNode *node, const aiScene *scene)
{
    // 处理节点所有的网格(如果有的话)
    for(unsigned int i = 0; i < node->mNumMeshes; i++)
    {
        aiMesh *mesh = scene->mMeshes[node->mMeshes[i]];
        meshes.push_back(processMesh(mesh, scene));
    }
    // 接下来对它的子节点重复这一过程
    for(unsigned int i = 0; i < node->mNumChildren; i++)
    {
        processNode(node->mChildren[i], scene);
    }
}之后调用processMesh()函数,这样就可以将从obj模型文件中加载出的数据处理到我设置的Mesh类中
Mesh processMesh(aiMesh *mesh, const aiScene *scene) {
        // data to fill
        vector<Vertex> vertices;
        vector<unsigned int> indices;

        // walk through each of the mesh's vertices
        for (unsigned int i = 0; i < mesh->mNumVertices; i++) {
            Vertex vertex;
            glm::vec3 vector;
          	// assimp使用自己的vector类,不能直接转换为glm的vec3类
          	// 所以首先将数据传输到这个占位符glm::vec3。
            // positions
            vector.x = mesh->mVertices[i].x;
            vector.y = mesh->mVertices[i].y;
            vector.z = mesh->mVertices[i].z;
            vertex.Position = vector;
            // normals
            if (mesh->HasNormals()) {
                vector.x = mesh->mNormals[i].x;
                vector.y = mesh->mNormals[i].y;
                vector.z = mesh->mNormals[i].z;
                vertex.Normal = vector;
            }
            vertices.push_back(vertex);
        }
        // 遍历每个网格的面(面是一个网格的三角形)并检索相应的顶点索引
        for (unsigned int i = 0; i < mesh->mNumFaces; i++) {
            aiFace face = mesh->mFaces[i];
            for (unsigned int j = 0; j < face.mNumIndices; j++)
                indices.push_back(face.mIndices[j]);
        }

        return Mesh(vertices, indices);
    }
2.3.3 shader.h
与上课时给出的shader.h代码相同
使用C++文件流读取着色器内容,储存到几个string对象里
以下实现了对着色器的编译和链接
unsigned int vertex, fragment;
// vertex shader
vertex = glCreateShader(GL_VERTEX_SHADER);
glShaderSource(vertex, 1, &vShaderCode, NULL);
glCompileShader(vertex);
checkCompileErrors(vertex, "VERTEX");
// fragment Shader
fragment = glCreateShader(GL_FRAGMENT_SHADER);
glShaderSource(fragment, 1, &fShaderCode, NULL);
glCompileShader(fragment);
checkCompileErrors(fragment, "FRAGMENT");
// shader Program
ID = glCreateProgram();
glAttachShader(ID, vertex);
glAttachShader(ID, fragment);
glLinkProgram(ID);
checkCompileErrors(ID, "PROGRAM");
// delete the shaders as they're linked into our program now and no longer necessary
glDeleteShader(vertex);
glDeleteShader(fragment);
定义了
void use() const { glUseProgram(ID); }2.3.4 camera.h
提供ProcessKeyboard, ProcessMouseMovement, ProcessMouseScroll方法,用于实现鼠标键盘控制
Camera 类 定义了位置,接收变化的变量,欧拉角,选项和构造函数,此外还有键盘鼠标操作函数和相机更新函数
class Camera
{
public:
    // camera Attributes
    glm::vec3 Position;
    glm::vec3 Front;
    glm::vec3 Up;
    glm::vec3 Right;
    glm::vec3 WorldUp;
    // euler Angles
    float Yaw;
    float Pitch;
    // camera options
    float MovementSpeed;
    float MouseSensitivity;
    float Zoom;

    // constructor with vectors
    Camera(glm::vec3 position = glm::vec3(0.0f, 0.0f, 0.0f),
           glm::vec3 up = glm::vec3(0.0f, 1.0f, 0.0f),
           float yaw = YAW, float pitch = PITCH) :
           Front(glm::vec3(0.0f, 0.0f, -1.0f)),
           MovementSpeed(SPEED),
           MouseSensitivity(SENSITIVITY),
           Zoom(ZOOM)
    {
        Position = position;
        WorldUp = up;
        Yaw = yaw;
        Pitch = pitch;
        updateCameraVectors();
    }
    // constructor with scalar values
    Camera(float posX, float posY, float posZ, float upX, float upY, float upZ, float yaw, float pitch) :
        Front(glm::vec3(0.0f, 0.0f, -1.0f)),
        MovementSpeed(SPEED),
        MouseSensitivity(SENSITIVITY),
        Zoom(ZOOM)
    {
        Position = glm::vec3(posX, posY, posZ);
        WorldUp = glm::vec3(upX, upY, upZ);
        Yaw = yaw;
        Pitch = pitch;
        updateCameraVectors();
    }

    // returns the view matrix calculated using Euler Angles and the LookAt Matrix
    glm::mat4 GetViewMatrix()
    {
        return glm::lookAt(Position, Position + Front, Up);
    }
};
ProcessKeyboard处理从任何类似键盘的输入系统接收的输入
void ProcessKeyboard(Camera_Movement direction, float deltaTime)
    {
        float velocity = MovementSpeed * deltaTime;
        if (direction == FORWARD)
            Position += Front * velocity;
        if (direction == BACKWARD)
            Position -= Front * velocity;
        if (direction == LEFT)
            Position -= Right * velocity;
        if (direction == RIGHT)
            Position += Right * velocity;
        if (direction == DOWN)
            Position -= Up * velocity;
        if (direction == UP)
            Position += Up * velocity;
    }
ProcessMouseMovement处理从鼠标输入系统接收的输入。期望x和y方向上的偏移值。
void ProcessMouseMovement(float xoffset, float yoffset, GLboolean constrainPitch = true)
    {
        xoffset *= MouseSensitivity;
        yoffset *= MouseSensitivity;

        Yaw   += xoffset;
        Pitch += yoffset;

        // make sure that when pitch is out of bounds, screen doesn't get flipped
        if (constrainPitch)
        {
            if (Pitch > 89.0f)
                Pitch = 89.0f;
            if (Pitch < -89.0f)
                Pitch = -89.0f;
        }

        // update Front, Right and Up Vectors using the updated Euler angles
        updateCameraVectors();
}ProcessMouseScroll处理从鼠标滚轮事件接收的输入。只需要在垂直轮轴上输入
void ProcessMouseScroll(float yoffset)
    {
        Zoom -= (float)yoffset;
        if (Zoom < 1.0f)
            Zoom = 1.0f;
        if (Zoom > 45.0f)
            Zoom = 45.0f;
    }
updateCameraVectors
void updateCameraVectors()
    {
        // calculate the new Front vector
        glm::vec3 front;
        front.x = cos(glm::radians(Yaw)) * cos(glm::radians(Pitch));
        front.y = sin(glm::radians(Pitch));
        front.z = sin(glm::radians(Yaw)) * cos(glm::radians(Pitch));
        Front = glm::normalize(front);
        // also re-calculate the Right and Up vector
        Right = glm::normalize(glm::cross(Front, WorldUp));
        Up    = glm::normalize(glm::cross(Right, Front));
    }
2.3.5 model_loading(Main方法)
主方法
加载Shader,Model,Camera
Camera camera(glm::vec3(0.0f, 0.0f, 10.0f));Shader ourShader("../1.model_loading.vs", "../1.model_loading.fs");Model ourModel("../OBJ_Files/airboat.obj");
鼠标键盘操作
processInput (定义了键盘按键对应上下左右前后操作) 见processInput(GLFWwindow *window)
- W上/ S下/ A左/ D右/ Q前/ E后
void processInput(GLFWwindow *window)
{
    if (glfwGetKey(window, GLFW_KEY_ESCAPE) == GLFW_PRESS)
        glfwSetWindowShouldClose(window, true);

    if (glfwGetKey(window, GLFW_KEY_Q) == GLFW_PRESS)
        camera.ProcessKeyboard(FORWARD, deltaTime);
    if (glfwGetKey(window, GLFW_KEY_E) == GLFW_PRESS)
        camera.ProcessKeyboard(BACKWARD, deltaTime);
    if (glfwGetKey(window, GLFW_KEY_A) == GLFW_PRESS)
        camera.ProcessKeyboard(LEFT, deltaTime);
    if (glfwGetKey(window, GLFW_KEY_D) == GLFW_PRESS)
        camera.ProcessKeyboard(RIGHT, deltaTime);
    if (glfwGetKey(window, GLFW_KEY_W) == GLFW_PRESS)
        camera.ProcessKeyboard(UP, deltaTime);
    if (glfwGetKey(window, GLFW_KEY_S) == GLFW_PRESS)
        camera.ProcessKeyboard(DOWN, deltaTime);
} mouse_button_callback, mouse_callback, scroll_callback 实现了鼠标的操作
mouse_button_callback是检测鼠标点击左键右键时候对相机的更新操作mouse_callback是检测到鼠标移动时对相机的更新操作- ==这里定义了两个bool值来判断,只有在按压左键/右键时才对鼠标的移动进行处理==
bool leftMouseButtonDown = false;
bool rightMouseButtonDown = false;

void mouse_callback(GLFWwindow* window, double xposIn, double yposIn)
{
    if (leftMouseButtonDown) {
        float xpos = static_cast<float>(xposIn);
        float ypos = static_cast<float>(yposIn);

        if (firstMouse) {
            lastX = xpos;
            lastY = ypos;
            firstMouse = false;
        }

        float xoffset = xpos - lastX;
        float yoffset = lastY - ypos; // reversed since y-coordinates go from bottom to top

        lastX = xpos;
        lastY = ypos;

        camera.ProcessMouseMovement(xoffset, yoffset);
    }

    if (rightMouseButtonDown) {
        float xpos = static_cast<float>(xposIn);
        float ypos = static_cast<float>(yposIn);
        float xOffset = xpos - lastX;
        float yOffset = lastY - ypos; // 注意y方向翻转

        xOffset *= 0.1f;
        yOffset *= 0.1f;

        // 更新相机位置
        camera.Position += camera.Right * xOffset + camera.Up * yOffset;

        lastX = xpos;
        lastY = ypos;
    }

}

void mouse_button_callback(GLFWwindow* window, int button, int action, int mods) {
    if (button == GLFW_MOUSE_BUTTON_LEFT) {
        if(action == GLFW_PRESS){
            leftMouseButtonDown = true;
            glfwSetCursorPosCallback(window, mouse_callback);
        }
        else{leftMouseButtonDown = false;}

    }
    if (button == GLFW_MOUSE_BUTTON_RIGHT) {
        if(action == GLFW_PRESS){
            rightMouseButtonDown = true;
            glfwSetCursorPosCallback(window, mouse_callback);
        }
        else{leftMouseButtonDown = false;}
    }
}
鼠标滚轮
void scroll_callback(GLFWwindow* window, double xoffset, double yoffset)
{
    camera.ProcessMouseScroll(static_cast<float>(yoffset));
}
加载窗口,使用之前配置的Model, Mesh, Camera, Shader
#include <glad/glad.h>
#include <GLFW/glfw3.h>

#include <glm/glm.hpp>
#include <glm/gtc/matrix_transform.hpp>

#include <shader.h>
#include <camera.h>
#include <model.h>

#include <iostream>

void framebuffer_size_callback(GLFWwindow* window, int width, int height);
void mouse_callback(GLFWwindow* window, double xpos, double ypos);
void mouse_button_callback(GLFWwindow* window, int button, int action, int mods);
void scroll_callback(GLFWwindow* window, double xoffset, double yoffset);
void processInput(GLFWwindow *window);

// settings
const unsigned int SCR_WIDTH = 800;
const unsigned int SCR_HEIGHT = 600;

// camera
Camera camera(glm::vec3(0.0f, 0.0f, 10.0f));
float lastX = SCR_WIDTH / 2.0f;
float lastY = SCR_HEIGHT / 2.0f;
bool firstMouse = true;

// timing
float deltaTime = 0.0f;
float lastFrame = 0.0f;

glm::vec3 lightPos(1.2f, 1.0f, 2.0f);


int main()
{
    // glfw: initialize and configure
    // ------------------------------
    glfwInit();
    glfwWindowHint(GLFW_CONTEXT_VERSION_MAJOR, 3);
    glfwWindowHint(GLFW_CONTEXT_VERSION_MINOR, 3);
    glfwWindowHint(GLFW_OPENGL_PROFILE, GLFW_OPENGL_CORE_PROFILE);

#ifdef __APPLE__
    glfwWindowHint(GLFW_OPENGL_FORWARD_COMPAT, GL_TRUE);
#endif

    // glfw window creation
    // --------------------
    GLFWwindow* window = glfwCreateWindow(SCR_WIDTH, SCR_HEIGHT, "ModelLoading", NULL, NULL);
    if (window == NULL)
    {
        std::cout << "Failed to create GLFW window" << std::endl;
        glfwTerminate();
        return -1;
    }
    glfwMakeContextCurrent(window);
    glfwSetFramebufferSizeCallback(window, framebuffer_size_callback);

    glfwSetMouseButtonCallback(window,mouse_button_callback);
    glfwSetScrollCallback(window, scroll_callback);

    // tell GLFW to capture our mouse
    glfwSetInputMode(window, GLFW_CURSOR, GLFW_CURSOR_DISABLED);

    // glad: load all OpenGL function pointers
    // ---------------------------------------
    if (!gladLoadGLLoader((GLADloadproc)glfwGetProcAddress))
    {
        std::cout << "Failed to initialize GLAD" << std::endl;
        return -1;
    }


    // configure global opengl state
    // -----------------------------
    glEnable(GL_DEPTH_TEST);

    // build and compile shaders
    // -------------------------
    Shader ourShader("../1.model_loading.vs", "../1.model_loading.fs");
    Shader lightCubeShader("../configFiles/2.2.light_cube.vs", "../configFiles/2.2.light_cube.fs");

//    Shader ourShader("../1.colors.vert", "../1.colors.vert");

    // load models
    // -----------
    Model ourModel("../OBJ_Files/airboat.obj");


    // render loop
    // -----------
    while (!glfwWindowShouldClose(window))
    {
        // per-frame time logic
        // --------------------
        float currentFrame = static_cast<float>(glfwGetTime());
        deltaTime = currentFrame - lastFrame;
        lastFrame = currentFrame;

        // input
        // -----
        processInput(window);

        // render
        // ------
//        glClearColor(0.05f, 0.05f, 0.05f, 1.0f);
        glClearColor(0.2f, 0.3f, 0.3f, 1.0f);

        glClear(GL_COLOR_BUFFER_BIT | GL_DEPTH_BUFFER_BIT);

        // don't forget to enable shader before setting uniforms
        ourShader.use();
        // be sure to activate shader when setting uniforms/drawing objects
        ourShader.setVec3("lightColor", 1.0f, 1.5f, 1.0f);
        ourShader.setVec3("lightPos", lightPos);
        ourShader.setVec3("viewPos", camera.Position);

        // view/projection transformations
        glm::mat4 projection = glm::perspective(glm::radians(camera.Zoom), (float)SCR_WIDTH / (float)SCR_HEIGHT, 0.1f, 100.0f);
        glm::mat4 view = camera.GetViewMatrix();
        ourShader.setMat4("projection", projection);
        ourShader.setMat4("view", view);

        // render the loaded model
        glm::mat4 model = glm::mat4(1.0f);
        model = glm::translate(model, glm::vec3(0.0f, 0.0f, 0.0f)); // translate it down so it's at the center of the scene
        model = glm::scale(model, glm::vec3(1.0f, 1.0f, 1.0f));	// it's a bit too big for our scene, so scale it down
        ourShader.setMat4("model", model);
        ourModel.Draw(ourShader);
//        ourModel2.Draw(ourShader);
//        ourModel3.Draw(ourShader);

        //--
        lightCubeShader.use();
        lightCubeShader.setMat4("projection", projection);
        lightCubeShader.setMat4("view", view);
        model = glm::mat4(1.0f);
        model = glm::translate(model, lightPos);
        model = glm::scale(model, glm::vec3(0.2f)); // a smaller cube
        lightCubeShader.setMat4("model", model);
        //--

        // glfw: swap buffers and poll IO events (keys pressed/released, mouse moved etc.)
        // -------------------------------------------------------------------------------
        glfwSwapBuffers(window);
        glfwPollEvents();
    }

    // glfw: terminate, clearing all previously allocated GLFW resources.
    // ------------------------------------------------------------------
    glfwTerminate();
    return 0;
}
2.3.6 着色器配置文件
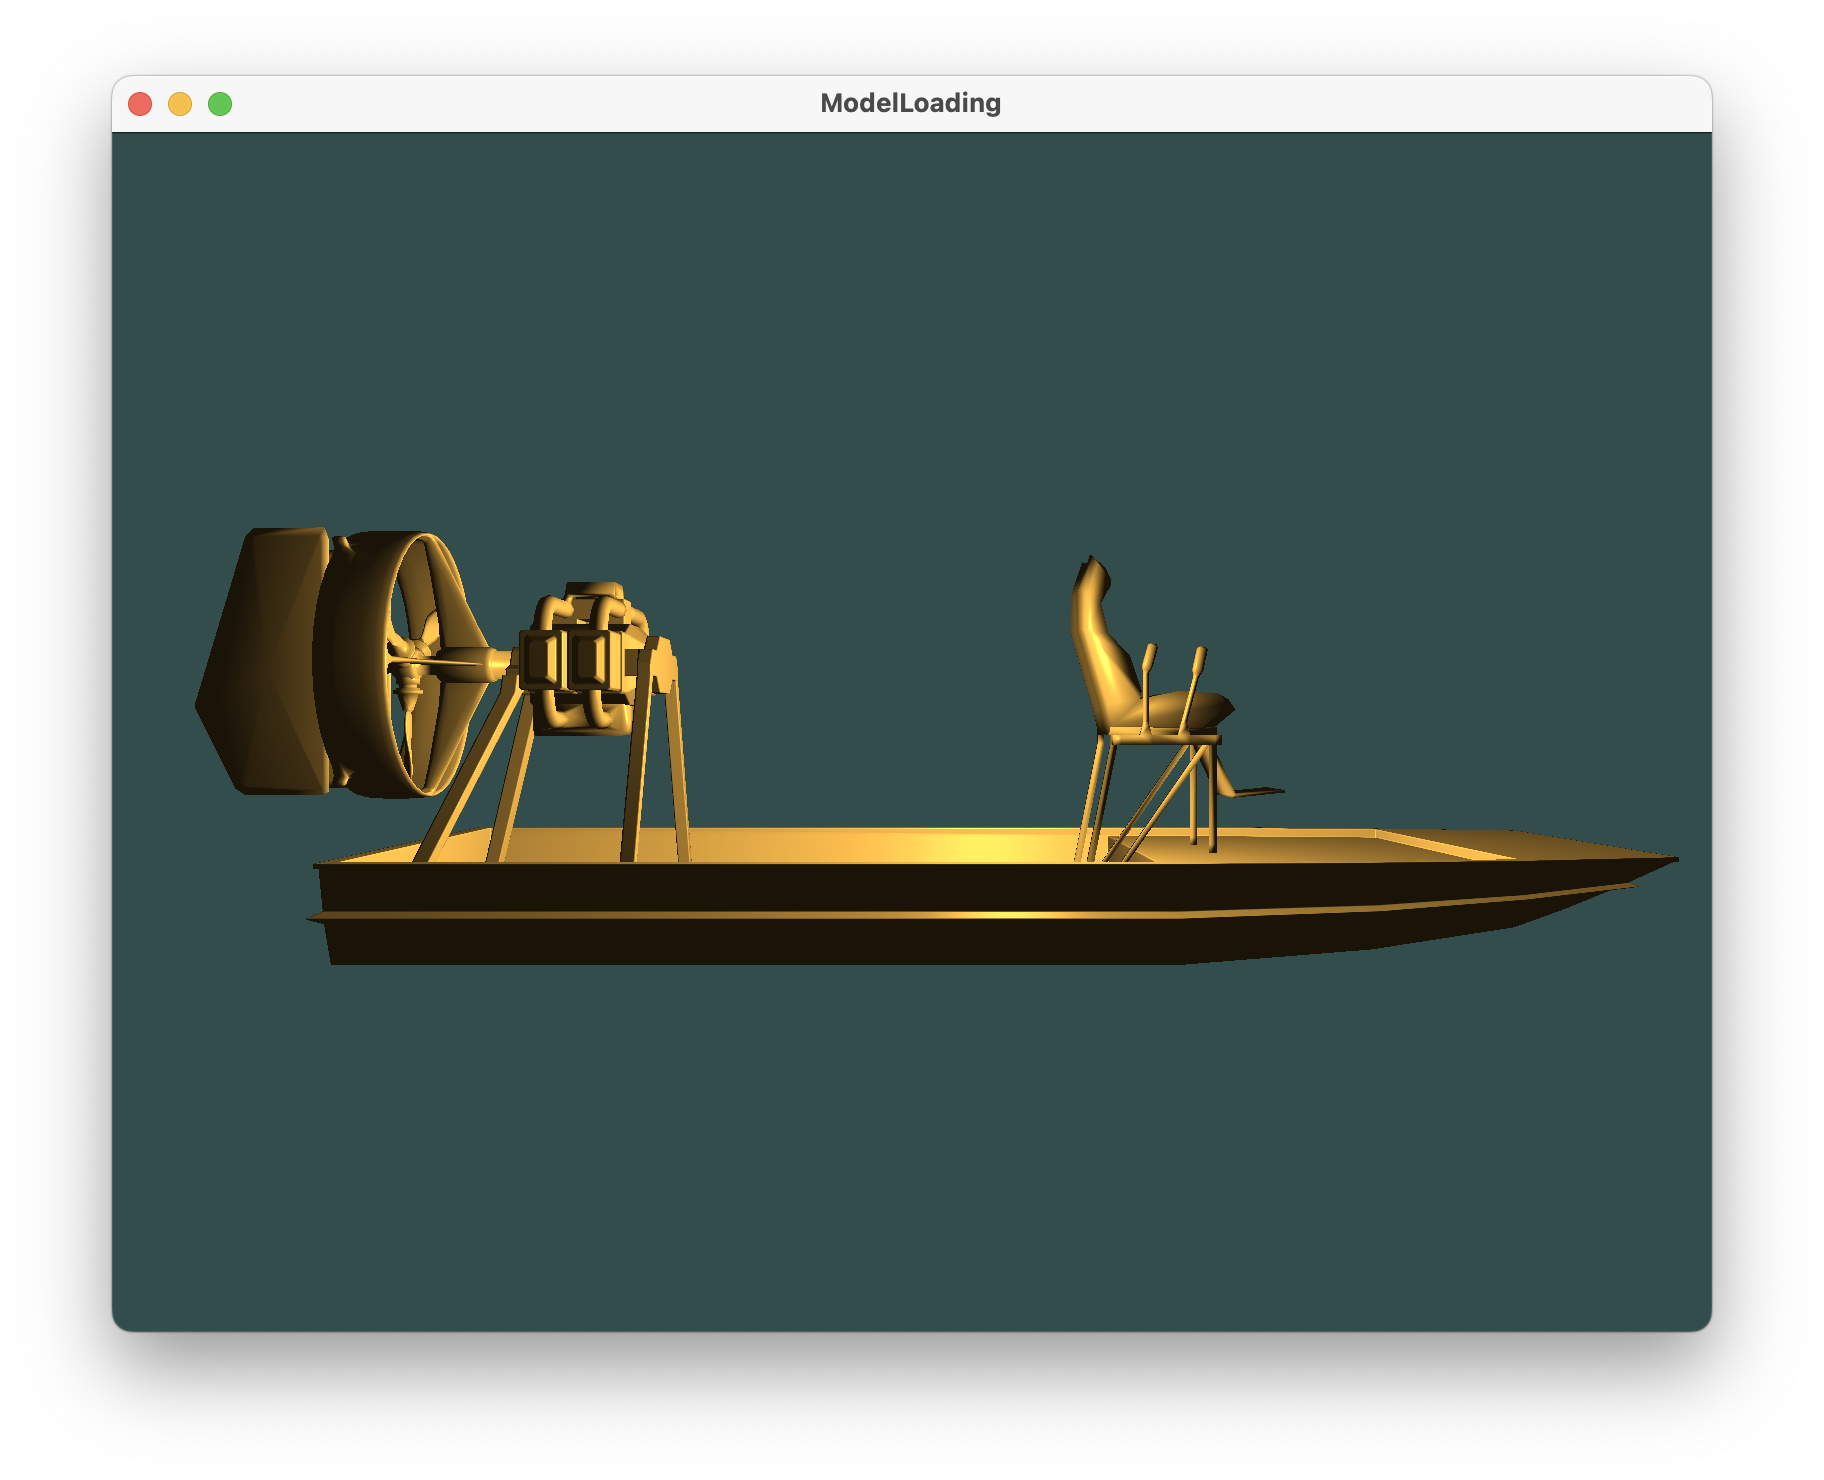
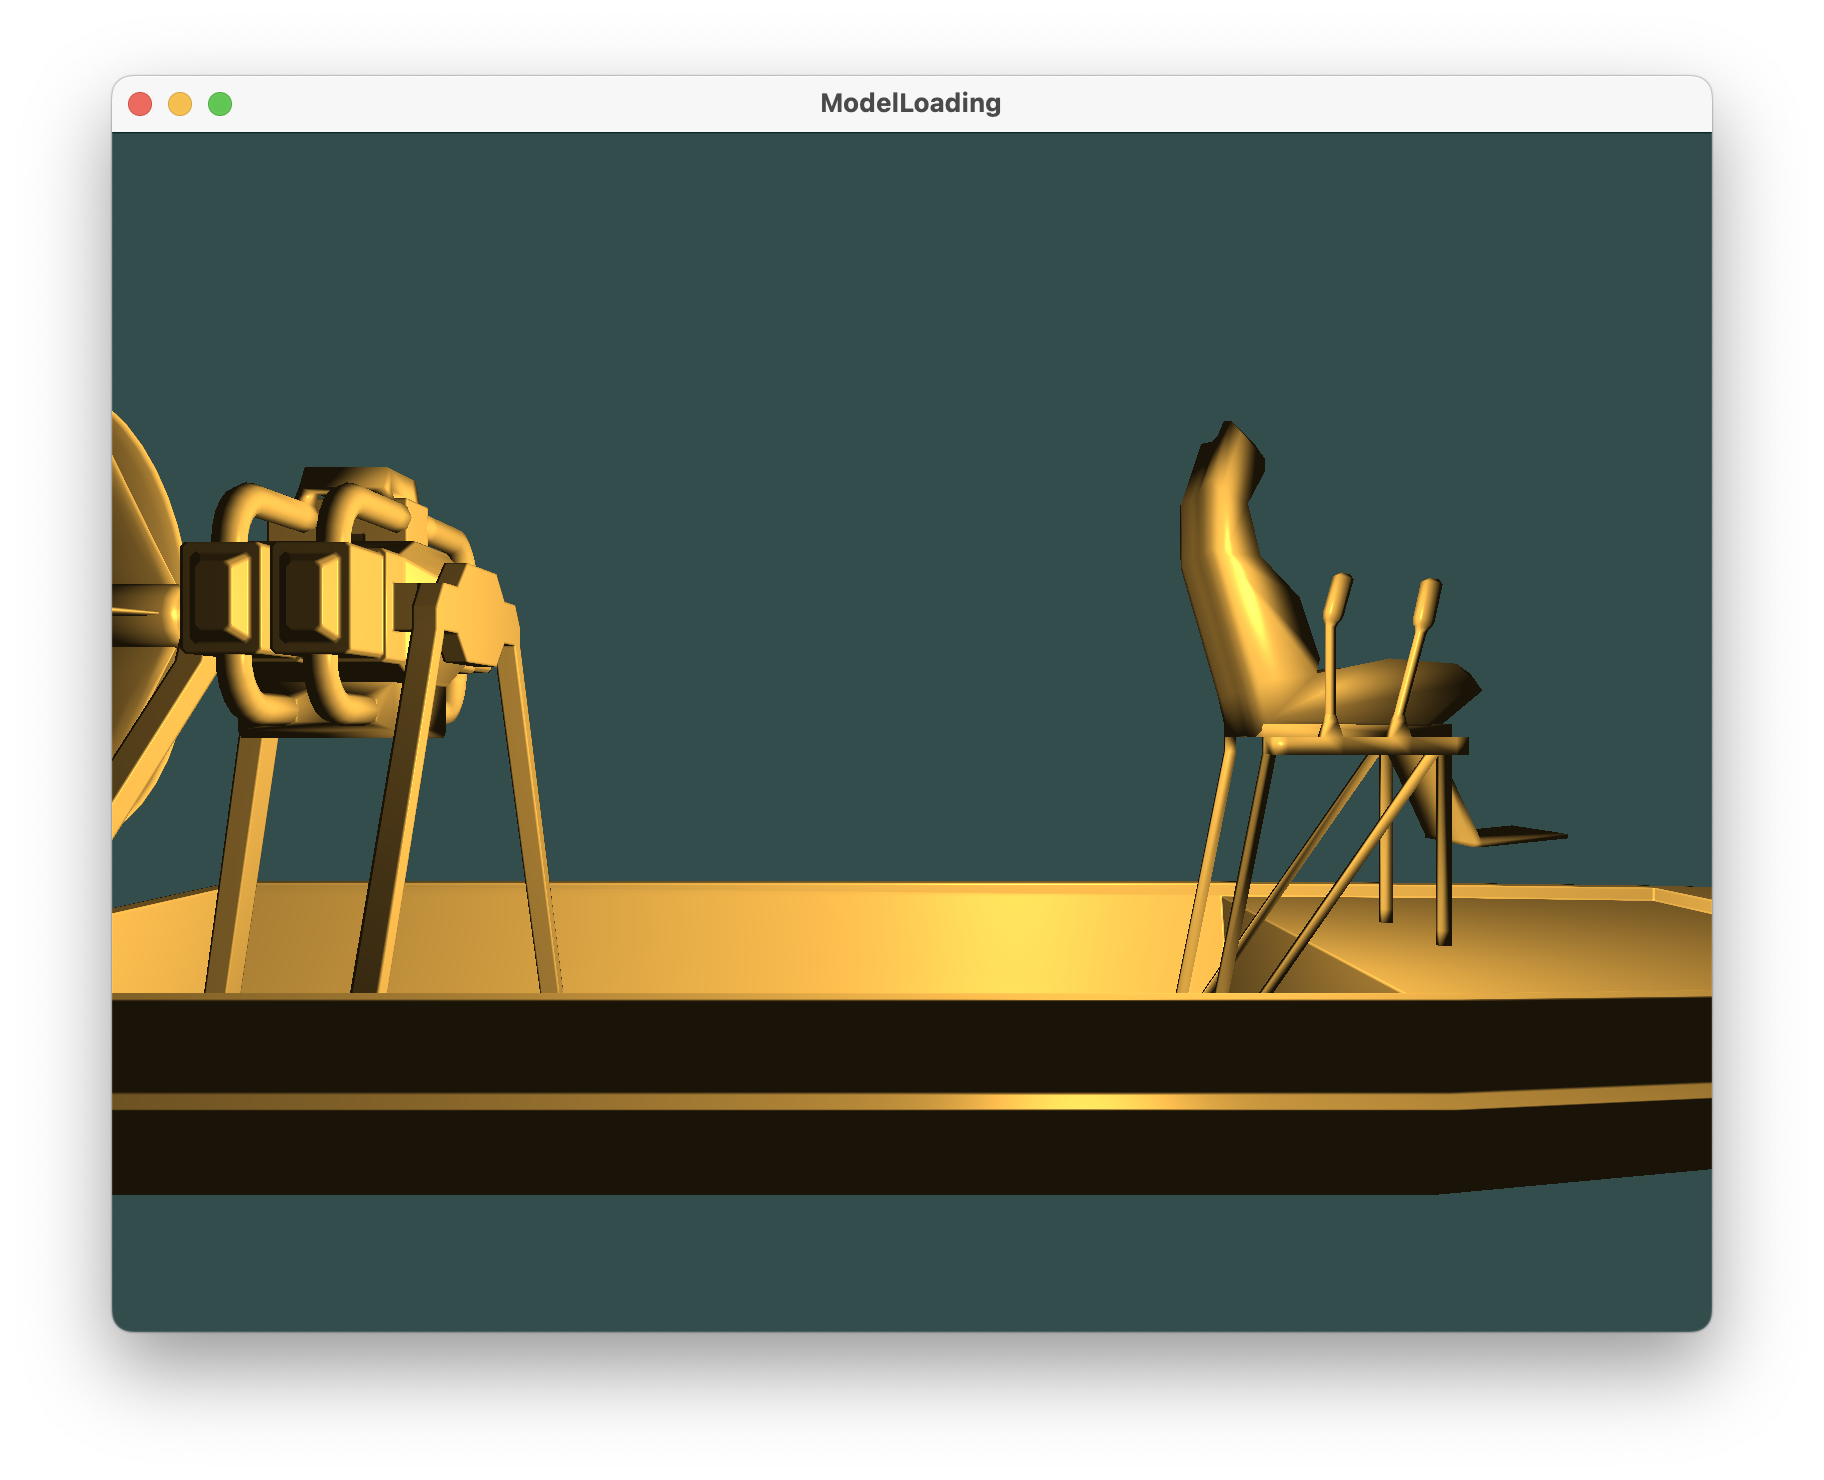
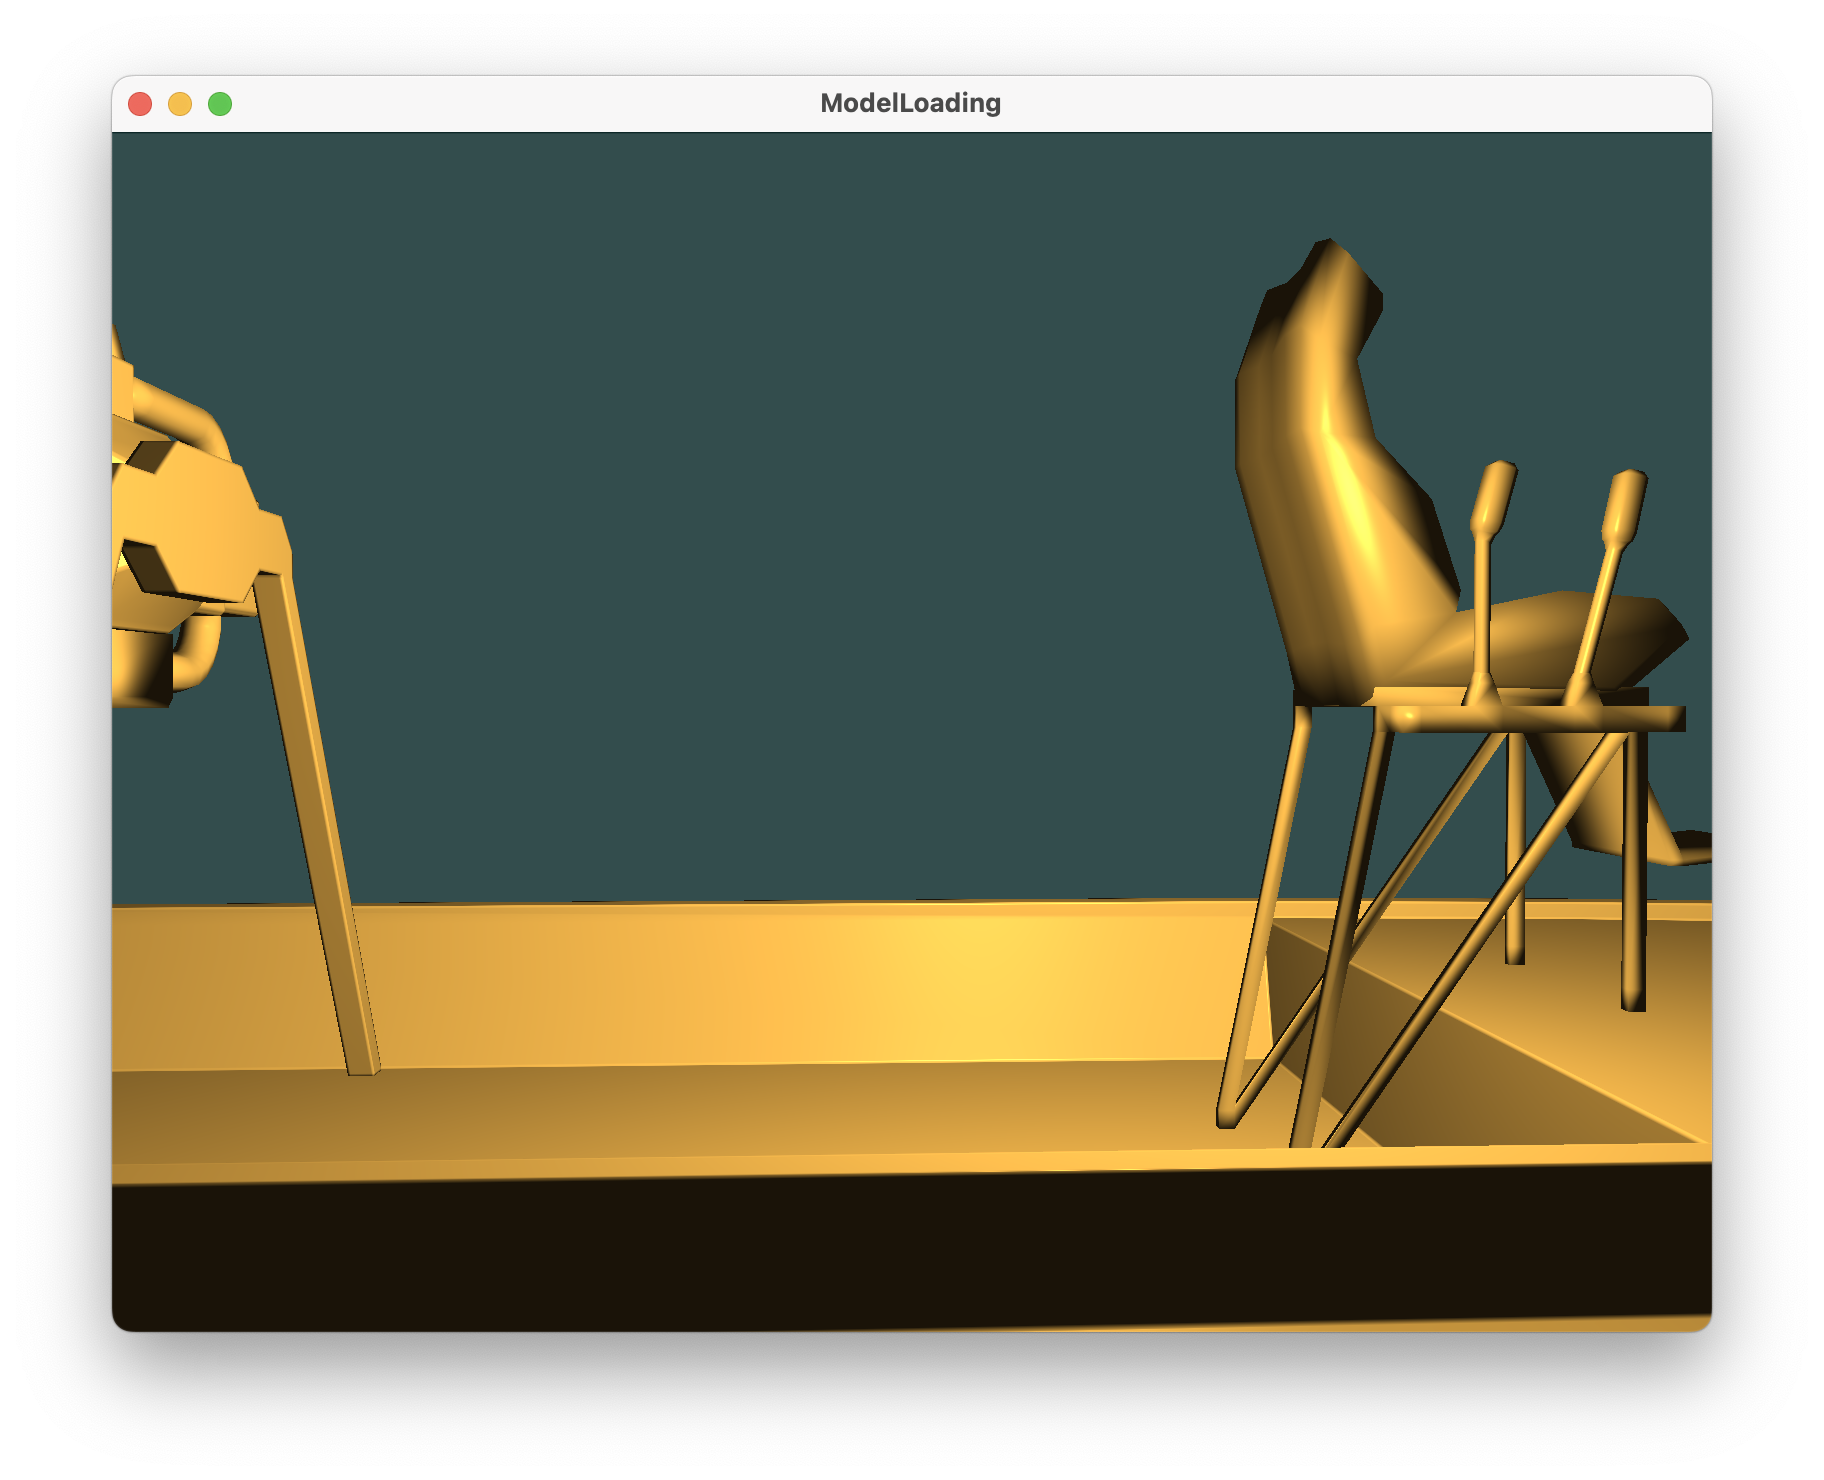
由于obj文件没有纹理和材质的信息,因此我加入了光照使得可以看清模型的立体结构
无光照效果如下
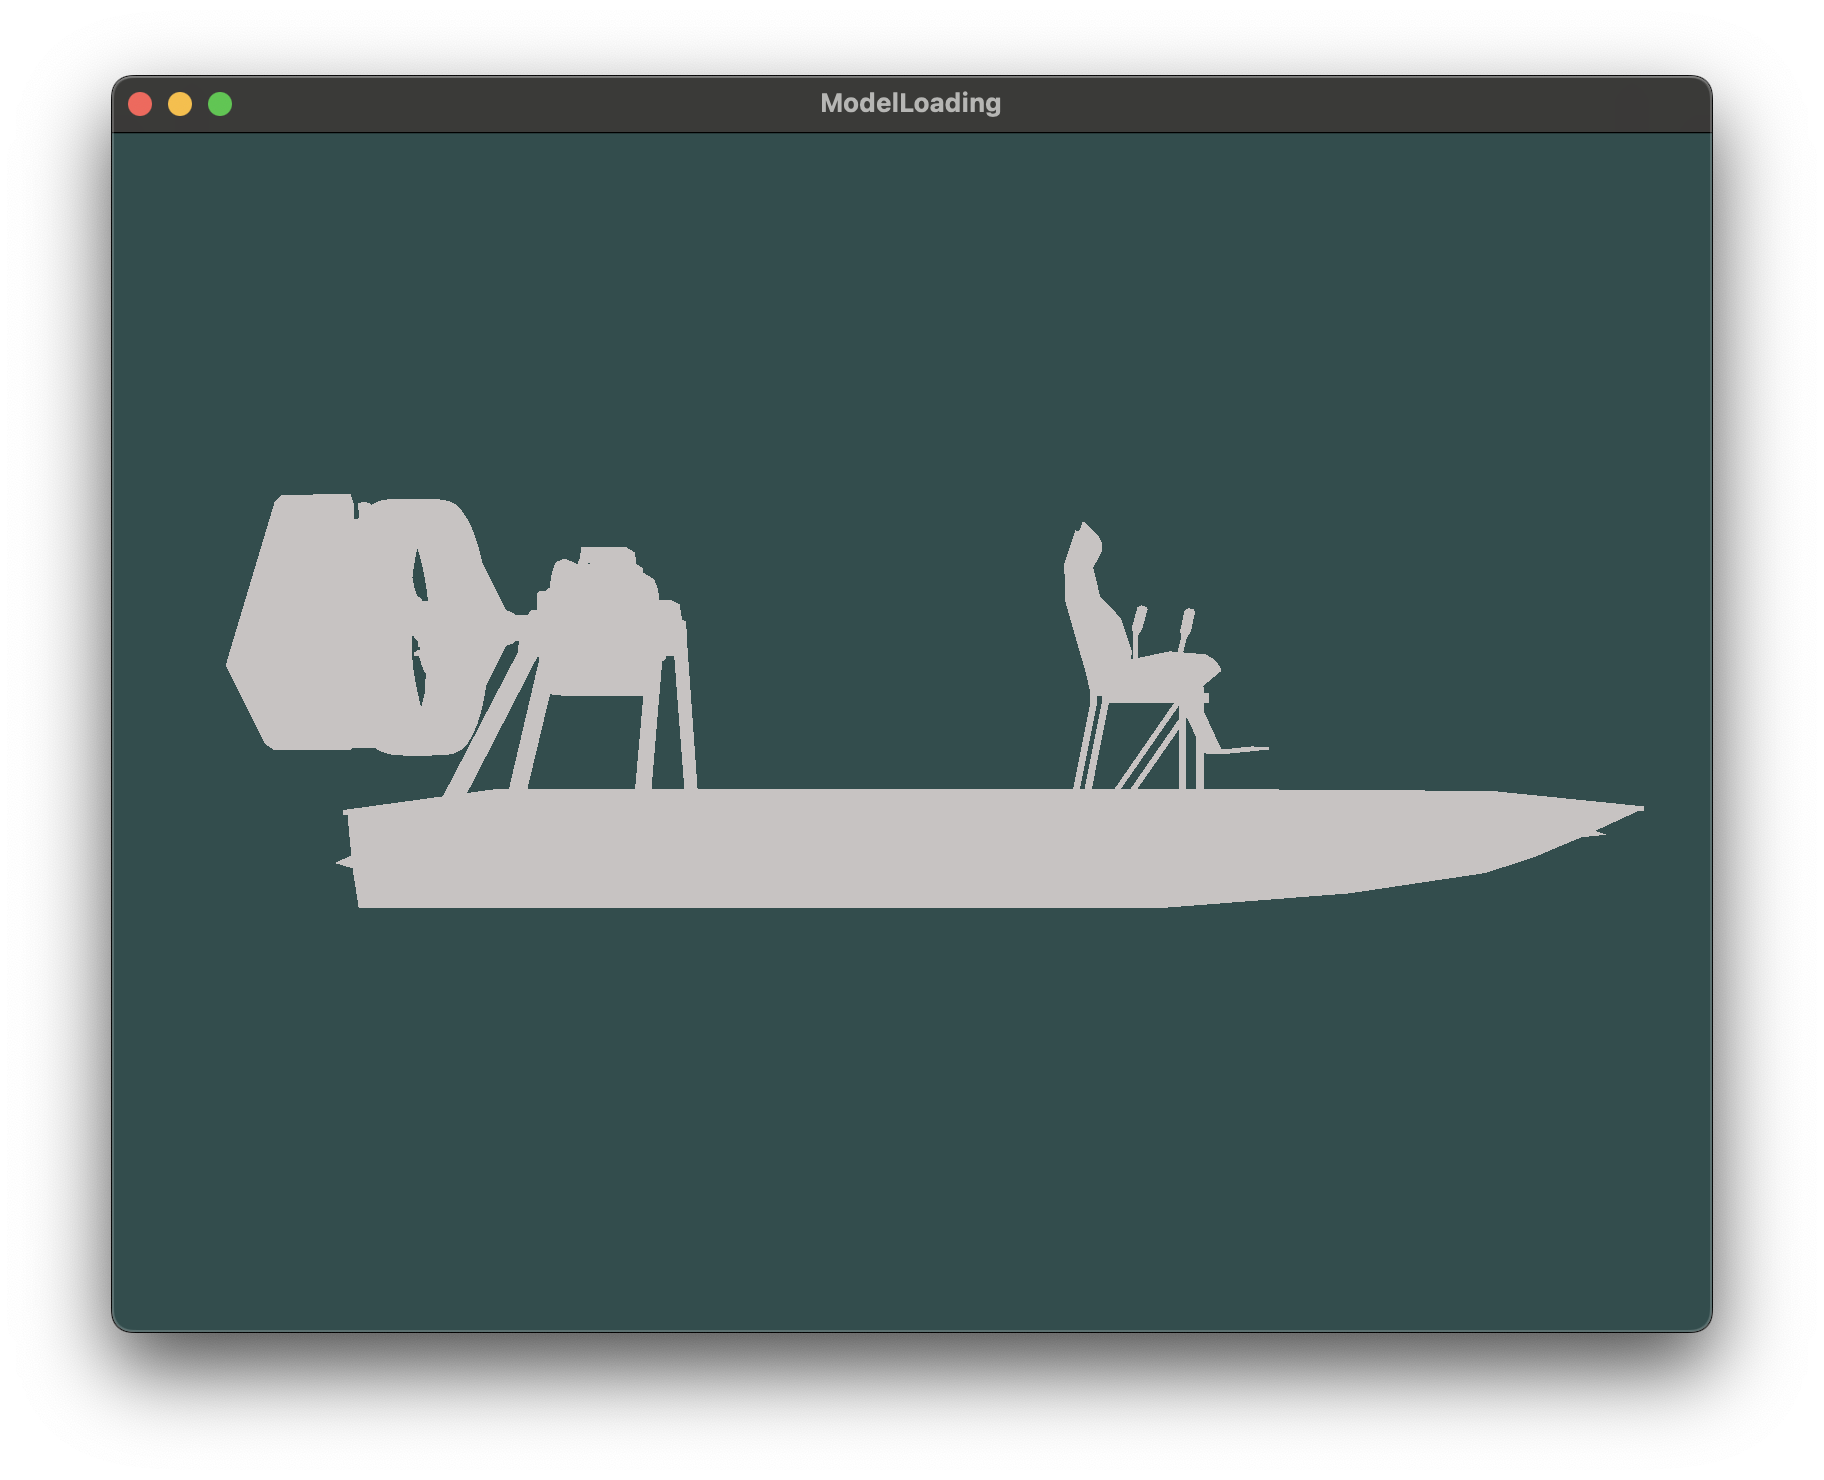
加入光照后效果如下
1.model_loading.vs
#version 330 core
layout (location = 0) in vec3 aPos;
layout (location = 1) in vec3 aNormal;

out vec3 FragPos;
out vec3 Normal;

uniform mat4 model;
uniform mat4 view;
uniform mat4 projection;

void main()
{
    FragPos = vec3(model * vec4(aPos, 1.0));
    Normal = mat3(transpose(inverse(model))) * aNormal;
    gl_Position = projection * view * vec4(FragPos, 1.0);
}
1.model_loading.fs
#version 330 core
out vec4 FragColor;

in vec3 Normal;
in vec3 FragPos;

uniform vec3 lightPos;
uniform vec3 viewPos;
uniform vec3 lightColor;

void main()
{
    vec3 objectColor = vec3(1.0f, 0.5f, 0.31f);

    // ambient
    float ambientStrength = 0.1;
    vec3 ambient = ambientStrength * lightColor;

    // diffuse
    vec3 norm = normalize(Normal);
    vec3 lightDir = normalize(lightPos - FragPos);
    float diff = max(dot(norm, lightDir), 0.0);
    vec3 diffuse = diff * lightColor;

    // specular
    float specularStrength = 0.5;
    vec3 viewDir = normalize(viewPos - FragPos);
    vec3 reflectDir = reflect(-lightDir, norm);
    float spec = pow(max(dot(viewDir, reflectDir), 0.0), 32);
    vec3 specular = specularStrength * spec * lightColor;

    vec3 result = (ambient + diffuse + specular) * objectColor;
    FragColor = vec4(result, 1.0);

}
3. 结果与讨论
3.1 结果
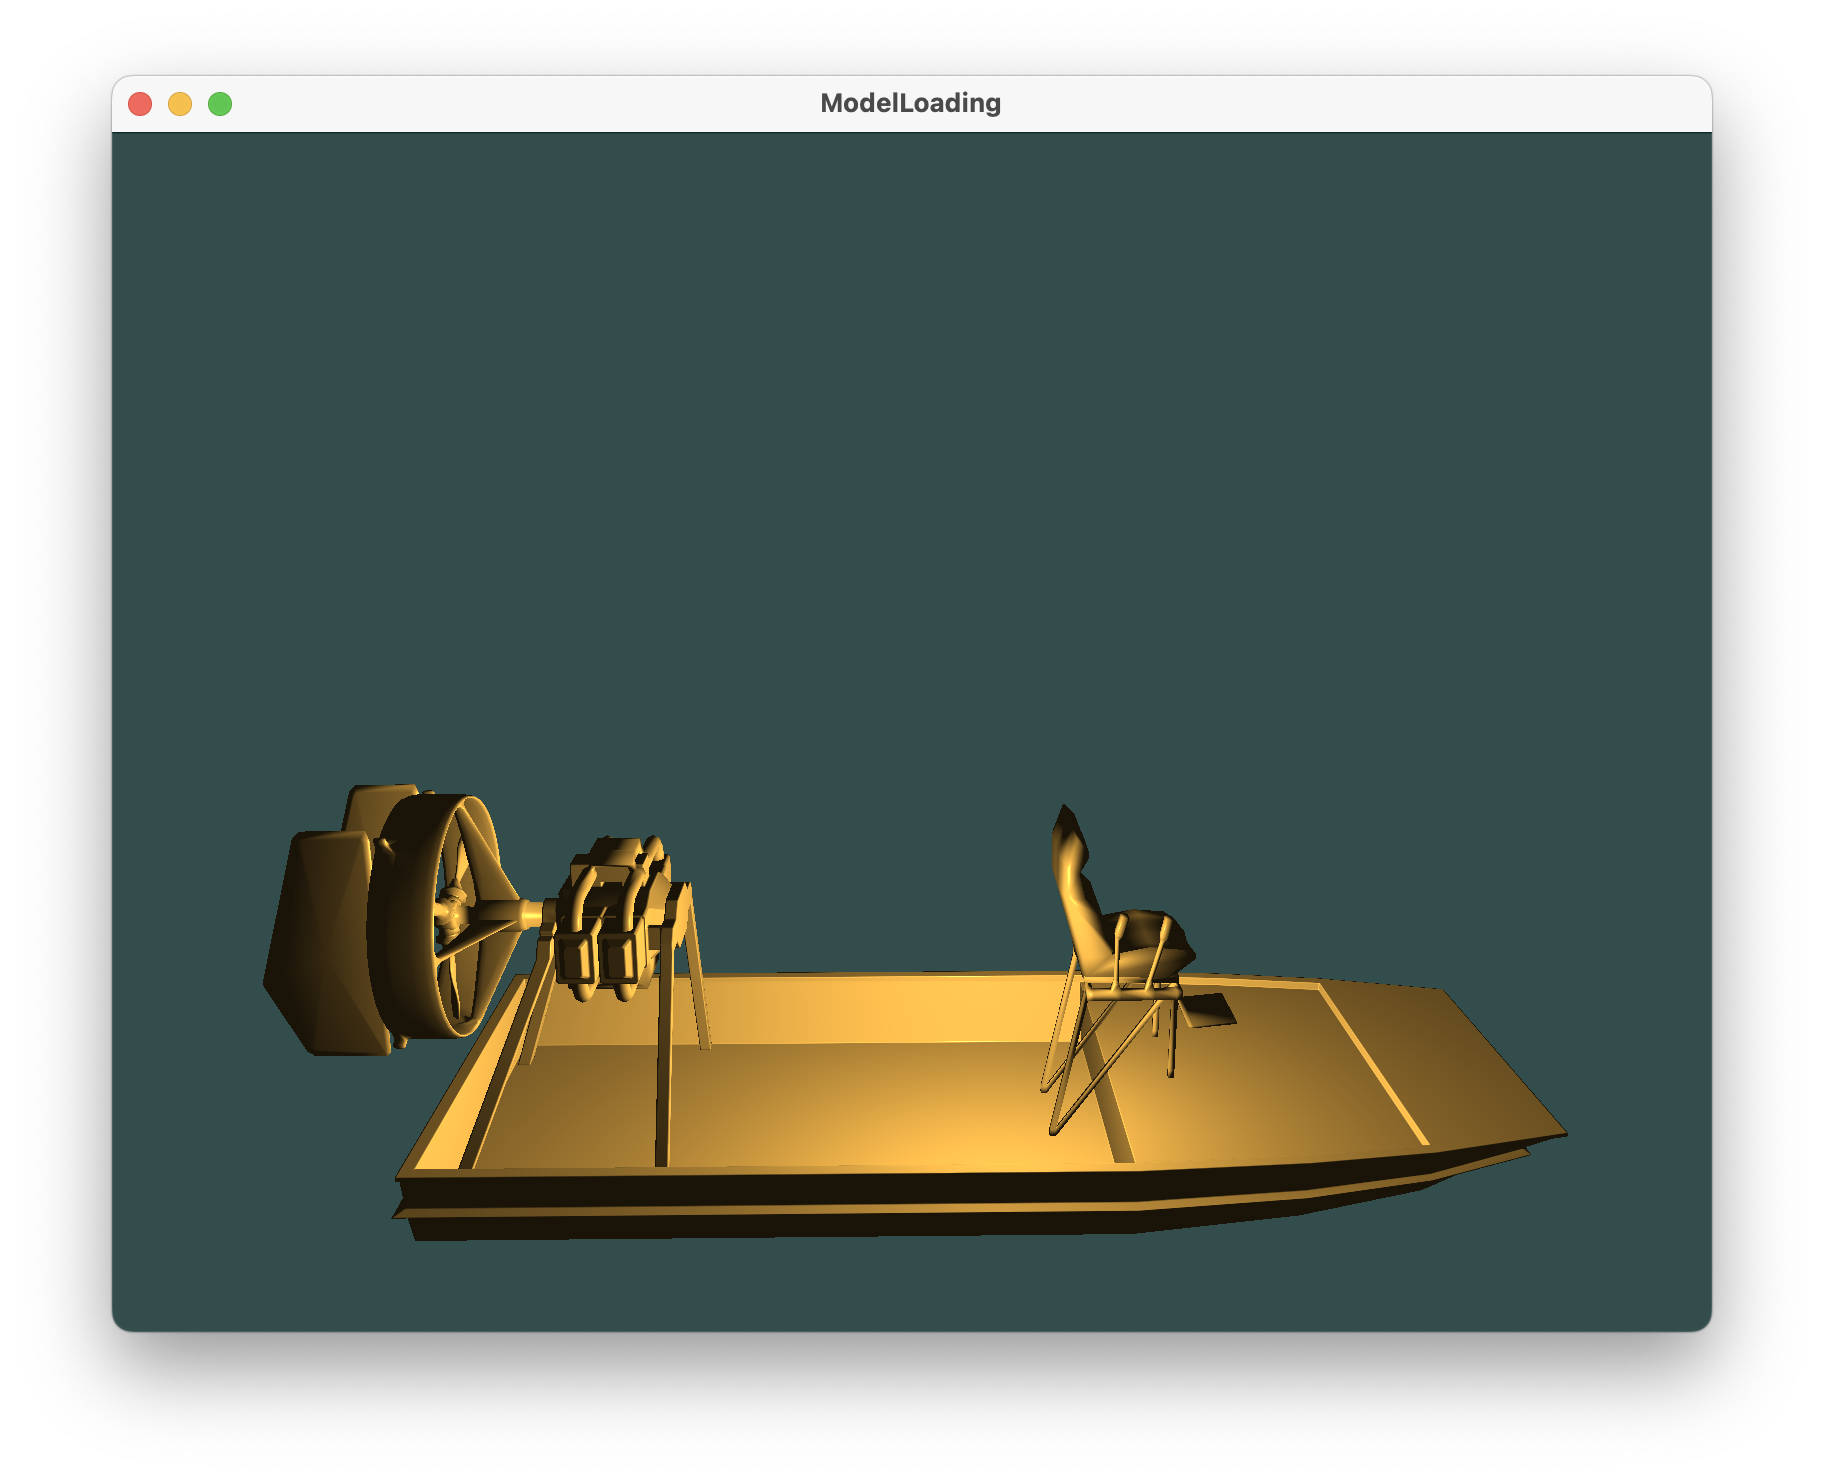
初始效果
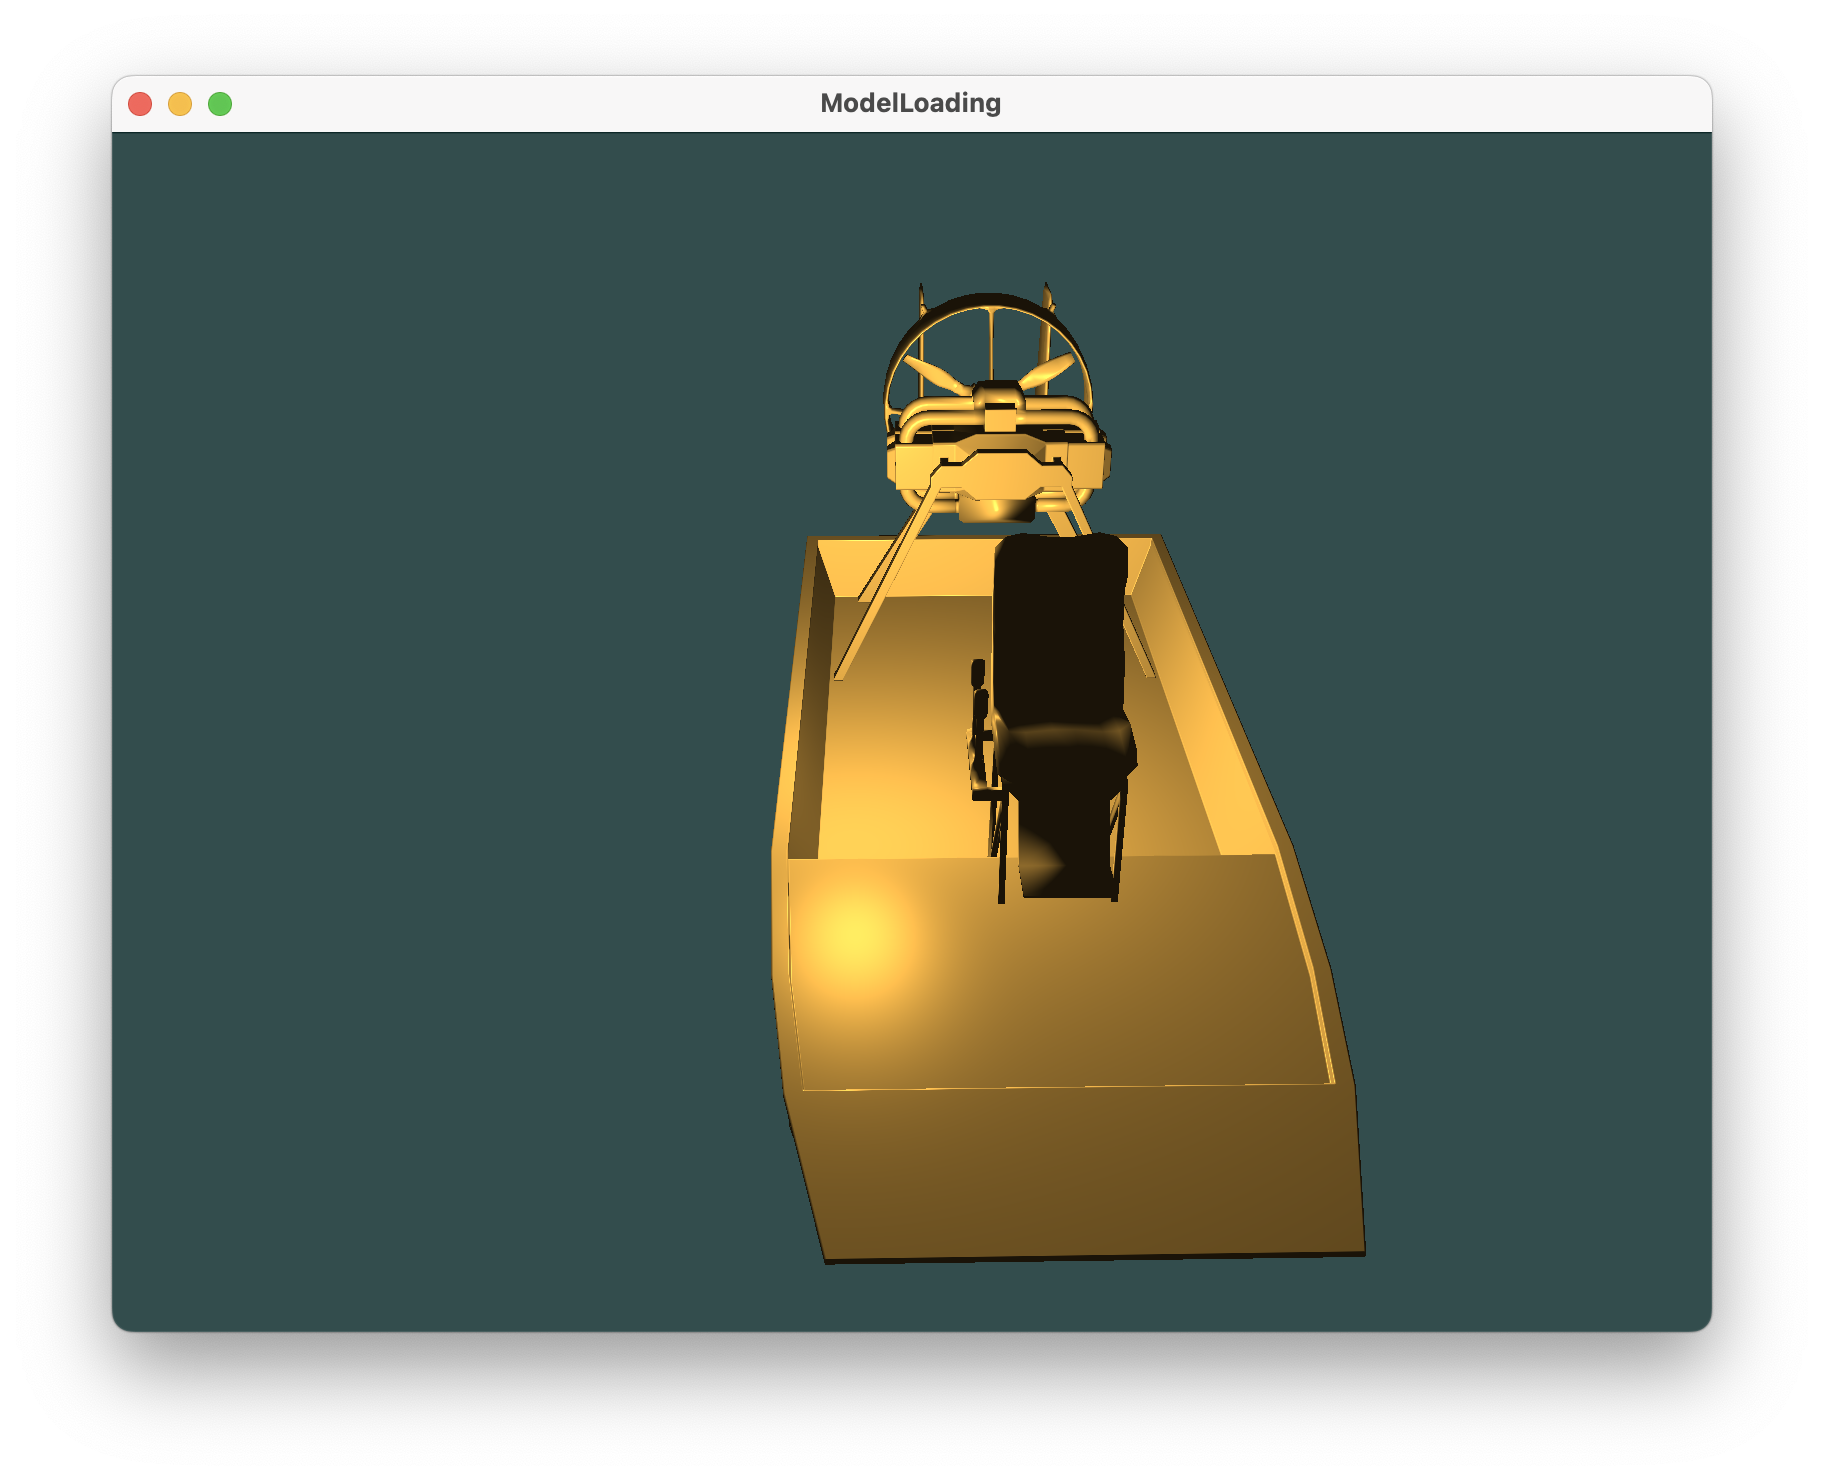
##### 向前
##### 向后
##### 向上
##### 旋转
其他具体操作见视频
3.2 讨论
在这一部分,你需要对你在开发过程中遇到的一些困难进行描述和你是如何攻克的,在方法上和结果上展开叙述。 第三章占整体篇幅的30%。
- 模型加载和显示问题:最初尝试自己解析和加载OBJ文件时,我遇到了各种问题,包括正确读取文件、解析顶点、法线和纹理坐标数据等。这些问题耗费了很多时间。然而,通过使用Assimp库,加载模型变得更加容易和高效。
- 相机控制和光照调试:实现键盘和鼠标控制相机位置和方向时,需要深入理解OpenGL的视图和投影矩阵,以及如何处理用户输入。同时,由于最开始没有材质纹理和光照,显示效果很糟糕,我尝试自己学习添加光照,添加光照效果也需要仔细调整材质、光照强度和颜色等参数,以获得满意的渲染结果。
- 着色器编写:编写顶点和片段着色器来实现光照模型是一个有挑战性的任务。理解光照模型的原理,以及如何在着色器中计算环境光、漫反射和镜面反射等部分也很有挑战
4. 收获和建议
课程收获,项目开发收获,课程建议等各个方面展开来叙述。内容上要有意义,量上要占整篇报告的10%左右。
- 更深入的理解OpenGL:通过项目,我加深了对OpenGL的理解,包括顶点和片段着色器、VBO、VAO等概念。我学会了如何加载和渲染3D模型,以及如何处理用户输入来控制相机位置和方向。
- 熟悉了Assimp库:使用Assimp库来加载模型是一个非常有用的技能,它使加载不同格式的3D模型变得更加容易。我学到了如何使用Assimp导入模型数据,以及如何在OpenGL中使用这些数据。
文章作者: Alan Zeng
原始链接: https://alanzeng.com/blogs/17893/
版权说明:本博客所有文章除特别声明外,均采用 BY-NC-SA 4.0许可协议。获得许可后,要求转载时注明文章出处和网站链接,谢谢!
本文参与 腾讯云自媒体同步曝光计划,分享自作者个人站点/博客。
原始发表:2023-10-19,如有侵权请联系 cloudcommunity@tencent.com 删除
评论
登录后参与评论
推荐阅读
目录
腾讯云开发者

Copyright © 2013 - 2026 Tencent Cloud. All Rights Reserved. 腾讯云 版权所有
深圳市腾讯计算机系统有限公司 ICP备案/许可证号:粤B2-20090059 ![]() 粤公网安备44030502008569号
粤公网安备44030502008569号
腾讯云计算(北京)有限责任公司 京ICP证150476号 | 京ICP备11018762号