SpringBoot自定义starter

SpringBoot自定义starter

chao超的搬运文章
发布于 2023-10-15 19:36:05
发布于 2023-10-15 19:36:05
参考文章:SpringBoot自定义starter_springboot3.0自定义starter_kksilu的博客-CSDN博客
我这里是根据上面博主的文章做的练习
一、新建模块
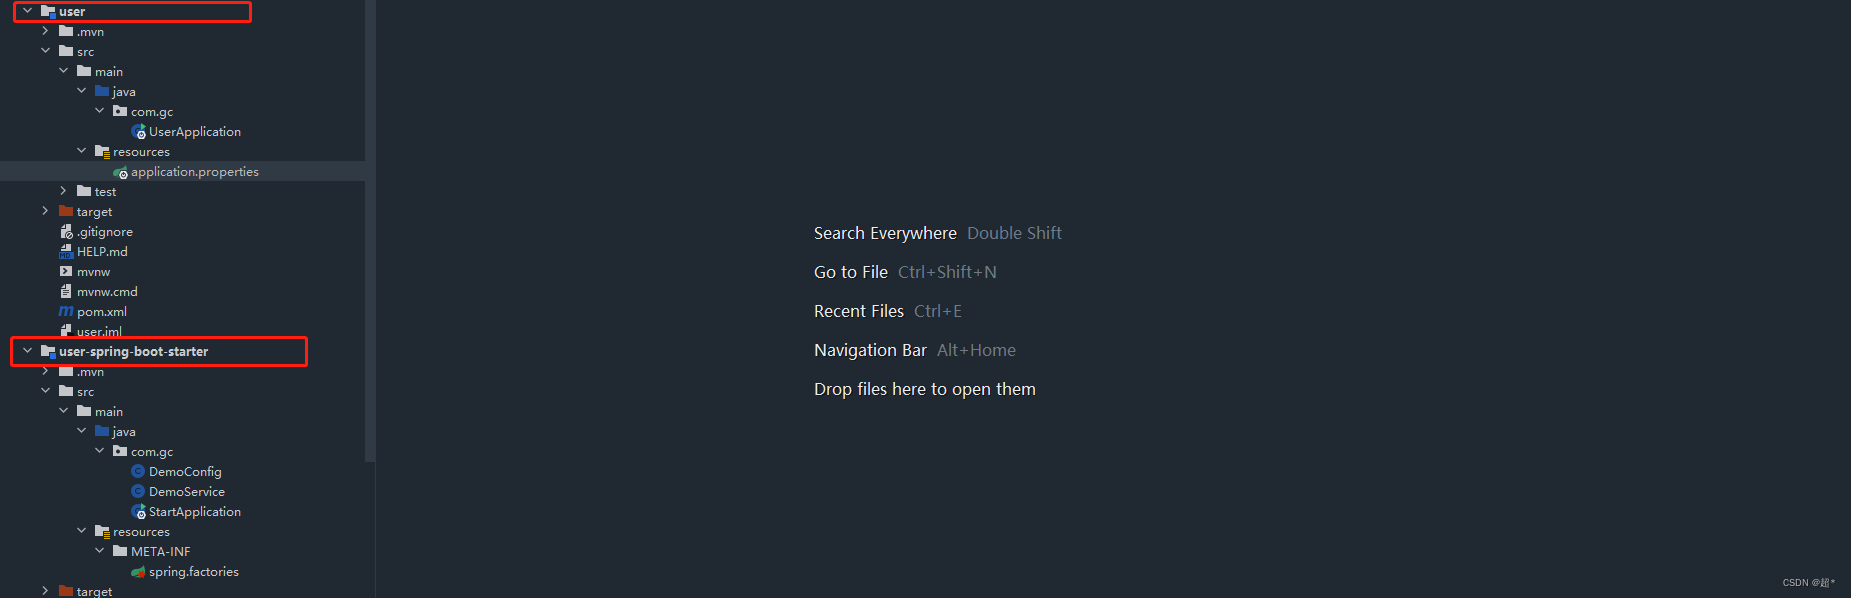
二、编写starter
DemoService:
package com.gc;

public class DemoService {
    private String demo;
    public DemoService(String demo){
        this.demo = demo;
    }

    @Override
    public String toString() {
        return "DemoService{" +
                "demo='" + demo + '\'' +
                '}';
    }
}
DemoConfig:
package com.gc;
import org.springframework.boot.context.properties.ConfigurationProperties;
import org.springframework.context.annotation.Bean;
import org.springframework.context.annotation.Configuration;
@Configuration
@ConfigurationProperties(prefix = "hh")
public class DemoConfig {
private String demo;
@Bean
public DemoService demoService(){
return new DemoService(demo);
}
public String getDemo() {
return demo;
}
public void setDemo(String demo) {
this.demo = demo;
}
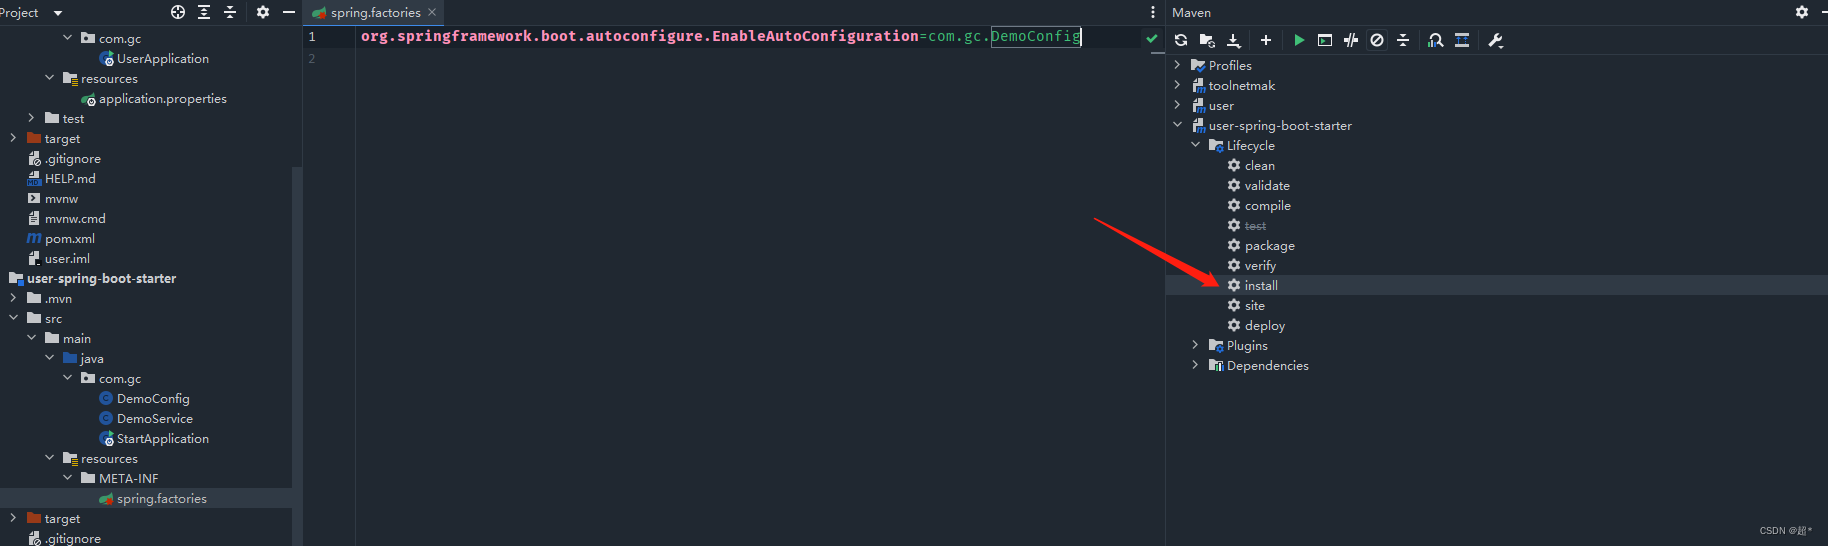
}Spring.factories:
org.springframework.boot.autoconfigure.EnableAutoConfiguration=com.gc.DemoConfig安装到maven仓库
三、引入自定义starter测试
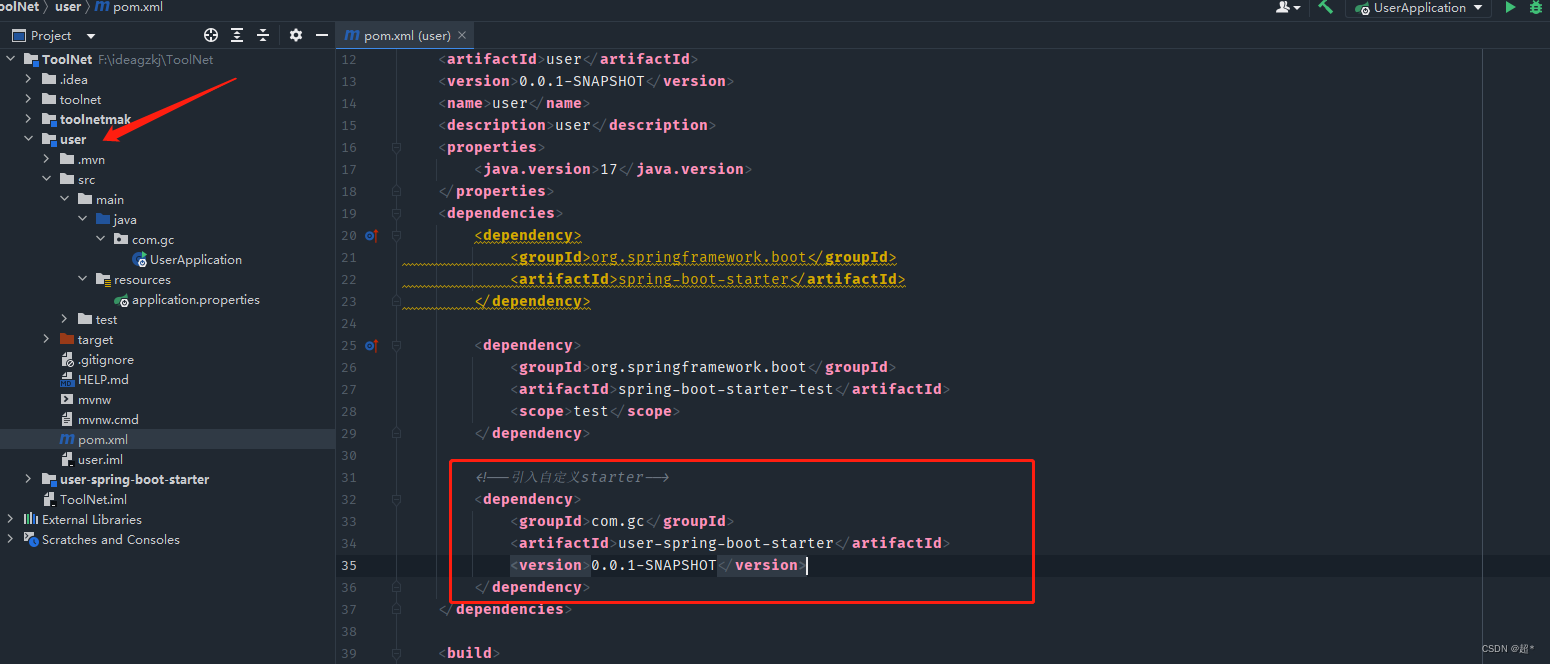
在application.properties中添加配置:
hh.demo=123启动类测试:
package com.gc;

import org.springframework.boot.SpringApplication;
import org.springframework.boot.autoconfigure.SpringBootApplication;
import org.springframework.context.ConfigurableApplicationContext;

@SpringBootApplication
public class UserApplication {
    public static void main(String[] args) {
        ConfigurableApplicationContext context = SpringApplication.run(UserApplication.class, args);
        DemoService demoservice = context.getBean("demoService", DemoService.class);
        System.out.println(demoservice);
    }

}
最后就可以看到,控制台输出 DemoService{demo='123'} 了!!!
本文参与 腾讯云自媒体同步曝光计划,分享自作者个人站点/博客。
原始发表:2023-07-05,如有侵权请联系 cloudcommunity@tencent.com 删除
评论
登录后参与评论
推荐阅读
目录
腾讯云开发者

Copyright © 2013 - 2026 Tencent Cloud. All Rights Reserved. 腾讯云 版权所有
深圳市腾讯计算机系统有限公司 ICP备案/许可证号:粤B2-20090059 ![]() 粤公网安备44030502008569号
粤公网安备44030502008569号
腾讯云计算(北京)有限责任公司 京ICP证150476号 | 京ICP备11018762号