ABP微服务系列学习-使用Tye启动微服务


安装tye
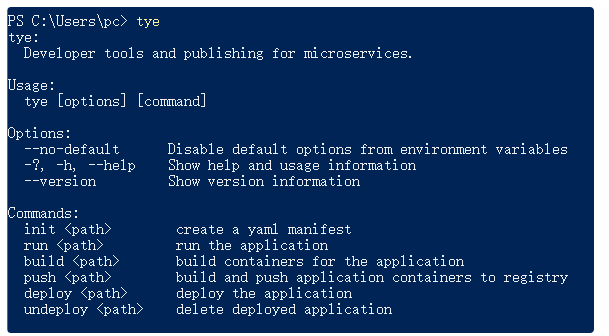
首先我们安装tye,使用dotnet cli命令。
dotnet tool install -g Microsoft.Tye --version "0.11.0-alpha.22111.1"安装完后即可使用tye命令
配置tye
首先我们使用tye init命令初始化tye.yaml配置文件 结构大致入下:
name: funshow
services:
- name:
  project:
- name:
  project:
我们需要在配置文件中添加我们的服务,包括绑定端口,环境变量等。 这里完整的配置文件如下:
name: FunShow
services:
- name: auth-server
  project: apps/auth-server/src/FunShow.AuthServer/FunShow.AuthServer.csproj
  bindings:
    - protocol: https
      port: 44322
  env:
    - Kestrel__Certificates__Default__Path=../../../../etc/dev-cert/localhost.pfx
    - Kestrel__Certificates__Default__Password=e8202f07-66e5-4619-be07-72ba76fde97f
- name: administration-service
  project: services/administration/src/FunShow.AdministrationService.HttpApi.Host/FunShow.AdministrationService.HttpApi.Host.csproj
  bindings:
    - protocol: https
      port: 44367
  env:
    - Kestrel__Certificates__Default__Path=../../../../etc/dev-cert/localhost.pfx
    - Kestrel__Certificates__Default__Password=e8202f07-66e5-4619-be07-72ba76fde97f
- name: identity-service
  project: services/identity/src/FunShow.IdentityService.HttpApi.Host/FunShow.IdentityService.HttpApi.Host.csproj
  bindings:
    - protocol: https
      port: 44388
  env:
    - Kestrel__Certificates__Default__Path=../../../../etc/dev-cert/localhost.pfx
    - Kestrel__Certificates__Default__Password=e8202f07-66e5-4619-be07-72ba76fde97f
- name: logging-service
  project: services/logging/src/FunShow.LoggingService.HttpApi.Host/FunShow.LoggingService.HttpApi.Host.csproj
  bindings:
    - protocol: https
      port: 45124
  env:
    - Kestrel__Certificates__Default__Path=../../../../etc/dev-cert/localhost.pfx
    - Kestrel__Certificates__Default__Password=e8202f07-66e5-4619-be07-72ba76fde97f
- name: web-gateway
  project: gateways/web/src/FunShow.WebGateway/FunShow.WebGateway.csproj
  bindings:
    - protocol: https
      port: 44325
  env:
    - Kestrel__Certificates__Default__Path=../../../../etc/dev-cert/localhost.pfx
    - Kestrel__Certificates__Default__Password=e8202f07-66e5-4619-be07-72ba76fde97f
bindings表示我们绑定https以及端口号。 env里面配置了我们的本地开发HTTPS证书。
创建本地证书
上面配置里面我们有加载本地证书,那么怎么创建证书呢,在tye仓库中也有说明 https://github.com/dotnet/tye/blob/main/docs/tutorials/hello-tye/00_run_locally.md#generate-the-certificate 仓库中是在linux环境,但是在windows环境中localhost.conf是一样的
[req]
default_bits       = 2048
default_keyfile    = localhost.key
distinguished_name = req_distinguished_name
req_extensions     = req_ext
x509_extensions    = v3_ca

[req_distinguished_name]
commonName                  = Common Name (e.g. server FQDN or YOUR name)
commonName_default          = localhost
commonName_max              = 64

[req_ext]
subjectAltName = @alt_names

[v3_ca]
subjectAltName = @alt_names
basicConstraints = critical, CA:false
keyUsage = keyCertSign, cRLSign, digitalSignature,keyEncipherment

[alt_names]
DNS.1   = localhost
DNS.2   = 127.0.0.1
创建etc/dev-cert目录,在目录下添加localhost.conf文件,内容如上。 然后执行dotnet dev-certs命令
dotnet dev-certs https -v -ep localhost.pfx -p e8202f07-66e5-4619-be07-72ba76fde97f -t就会在目录下面生成localhost.pfx证书文件。
使用tye运行微服务
在目录下面执行tye运行命令
tye run --watch效果如下:

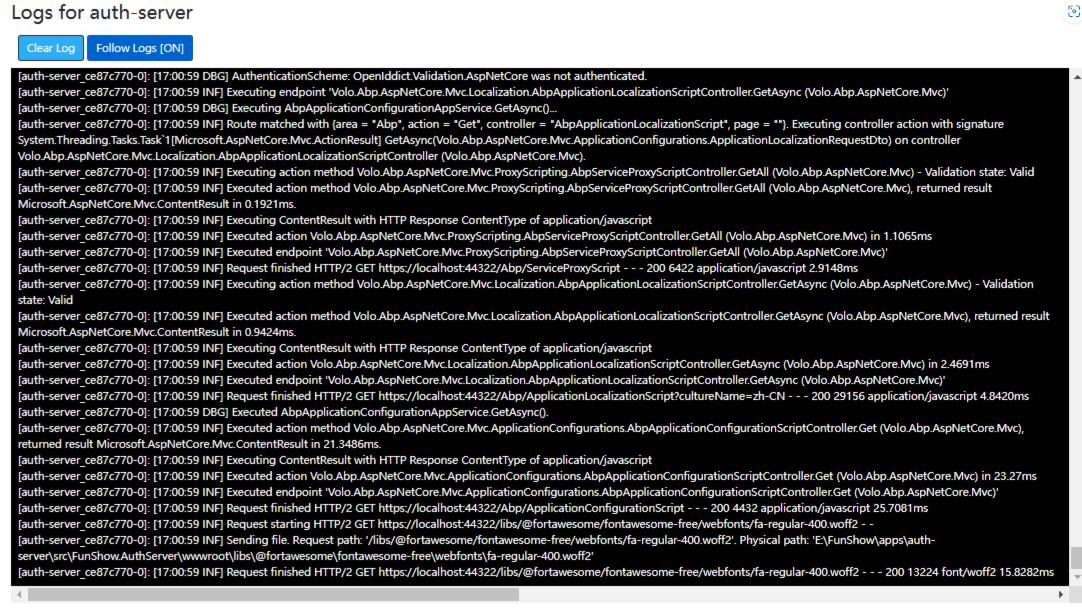
当然运行服务前我们需要把我们的基础服务都启动,如数据库,消息队列,redis等。 在tye dashboard可以查看服务的日志以及Metrics信息
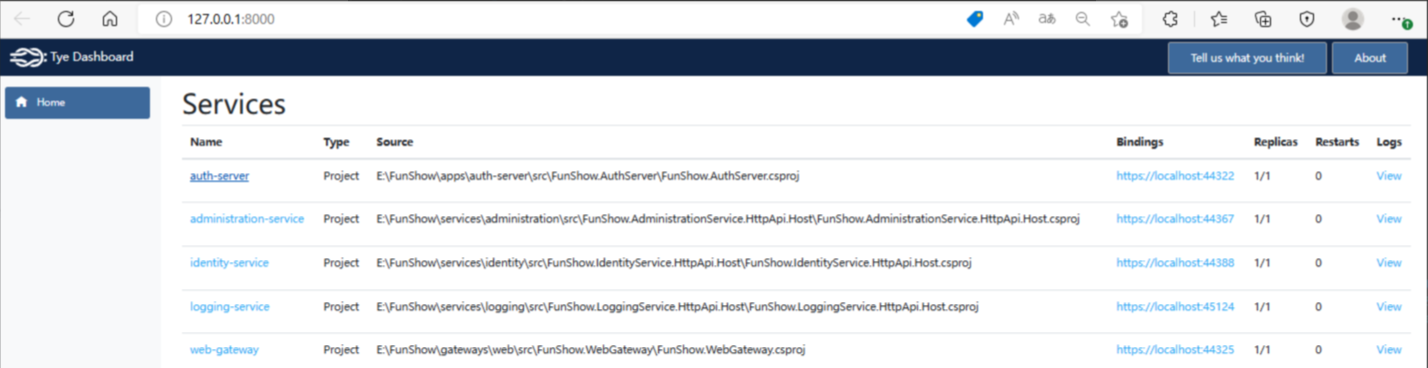
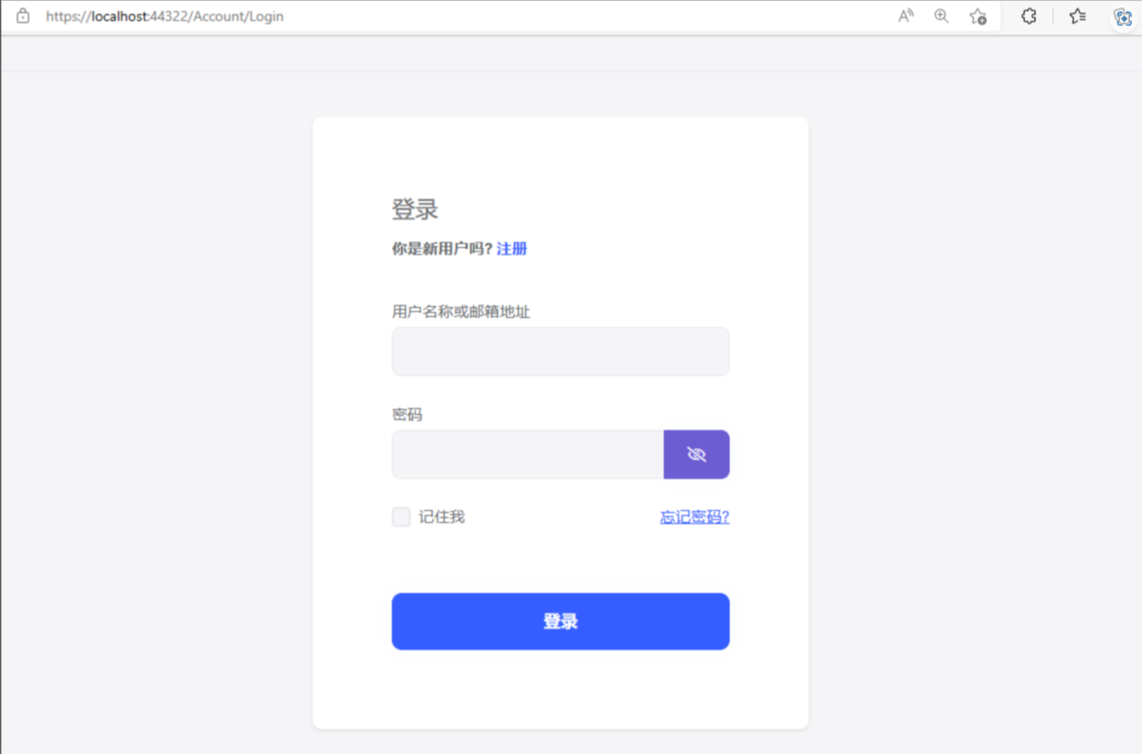
下面是服务启动页面。 网关服务
认证服务
到这我们后端功能就基本完成啦
本文参与 腾讯云自媒体同步曝光计划,分享自作者个人站点/博客。
原始发表:2023-03-02,如有侵权请联系 cloudcommunity@tencent.com 删除
评论
登录后参与评论
推荐阅读
目录
腾讯云开发者

Copyright © 2013 - 2026 Tencent Cloud. All Rights Reserved. 腾讯云 版权所有
深圳市腾讯计算机系统有限公司 ICP备案/许可证号:粤B2-20090059 ![]() 粤公网安备44030502008569号
粤公网安备44030502008569号
腾讯云计算(北京)有限责任公司 京ICP证150476号 | 京ICP备11018762号