IOS – OpenGL ES 设置图像锐化 GPUImageSharpenFilter
原创
IOS – OpenGL ES 设置图像锐化 GPUImageSharpenFilter
原创
猿说编程[Python和C]
发布于 2023-03-25 09:58:08
发布于 2023-03-25 09:58:08
目录
零基础 OpenGL (ES) 学习路线推荐 : OpenGL (ES) 学习目录 >> OpenGL ES 基础 零基础 OpenGL (ES) 学习路线推荐 : OpenGL (ES) 学习目录 >> OpenGL ES 转场 零基础 OpenGL (ES) 学习路线推荐 : OpenGL (ES) 学习目录 >> OpenGL ES 特效 零基础 OpenGL (ES) 学习路线推荐 : OpenGL (ES) 学习目录 >> OpenGL ES 函数 零基础 OpenGL (ES) 学习路线推荐 : OpenGL (ES) 学习目录 >> OpenGL ES GPUImage 使用 零基础 OpenGL (ES) 学习路线推荐 : OpenGL (ES) 学习目录 >> OpenGL ES GLSL 编程
一.简介
GPUImage 共 125 个滤镜, 分为四类
1、Color adjustments : 31 filters , 颜色处理相关 2、Image processing : 40 filters , 图像处理相关. 3、Blending modes : 29 filters , 混合模式相关. 4、Visual effects : 25 filters , 视觉效果相关.
GPUImageSharpenFilter 属于 GPUImage 图像处理相关,用来处理图像锐化效果,shader 源码如下:
/******************************************************************************************/
//@Author:猿说编程
//@Blog(个人博客地址): www.codersrc.com
//@File:IOS – OpenGL ES 设置图像锐化 GPUImageSharpenFilter
//@Time:2022/04/17 07:30
//@Motto:不积跬步无以至千里,不积小流无以成江海,程序人生的精彩需要坚持不懈地积累!
/******************************************************************************************/
NSString \*const kGPUImageSharpenVertexShaderString = SHADER_STRING
(
attribute vec4 position;
attribute vec4 inputTextureCoordinate;
uniform float imageWidthFactor;
uniform float imageHeightFactor;
uniform float sharpness;
varying vec2 textureCoordinate;
varying vec2 leftTextureCoordinate;
varying vec2 rightTextureCoordinate;
varying vec2 topTextureCoordinate;
varying vec2 bottomTextureCoordinate;
varying float centerMultiplier;
varying float edgeMultiplier;
void main()
{
gl_Position = position;
vec2 widthStep = vec2(imageWidthFactor, 0.0);
vec2 heightStep = vec2(0.0, imageHeightFactor);
textureCoordinate = inputTextureCoordinate.xy;
leftTextureCoordinate = inputTextureCoordinate.xy - widthStep;
rightTextureCoordinate = inputTextureCoordinate.xy + widthStep;
topTextureCoordinate = inputTextureCoordinate.xy + heightStep;
bottomTextureCoordinate = inputTextureCoordinate.xy - heightStep;
centerMultiplier = 1.0 + 4.0 * sharpness;
edgeMultiplier = sharpness;
}
);
#if TARGET_IPHONE_SIMULATOR || TARGET_OS_IPHONE
NSString \*const kGPUImageSharpenFragmentShaderString = SHADER_STRING
(
precision highp float;
varying highp vec2 textureCoordinate;
varying highp vec2 leftTextureCoordinate;
varying highp vec2 rightTextureCoordinate;
varying highp vec2 topTextureCoordinate;
varying highp vec2 bottomTextureCoordinate;
varying highp float centerMultiplier;
varying highp float edgeMultiplier;
uniform sampler2D inputImageTexture;
void main()
{
mediump vec3 textureColor = texture2D(inputImageTexture, textureCoordinate).rgb;
mediump vec3 leftTextureColor = texture2D(inputImageTexture, leftTextureCoordinate).rgb;
mediump vec3 rightTextureColor = texture2D(inputImageTexture, rightTextureCoordinate).rgb;
mediump vec3 topTextureColor = texture2D(inputImageTexture, topTextureCoordinate).rgb;
mediump vec3 bottomTextureColor = texture2D(inputImageTexture, bottomTextureCoordinate).rgb;
gl_FragColor = vec4((textureColor * centerMultiplier - (leftTextureColor * edgeMultiplier + rightTextureColor * edgeMultiplier + topTextureColor * edgeMultiplier + bottomTextureColor * edgeMultiplier)), texture2D(inputImageTexture, bottomTextureCoordinate).w);
}
);
#else
NSString \*const kGPUImageSharpenFragmentShaderString = SHADER_STRING
(
varying vec2 textureCoordinate;
varying vec2 leftTextureCoordinate;
varying vec2 rightTextureCoordinate;
varying vec2 topTextureCoordinate;
varying vec2 bottomTextureCoordinate;
varying float centerMultiplier;
varying float edgeMultiplier;
uniform sampler2D inputImageTexture;
void main()
{
vec3 textureColor = texture2D(inputImageTexture, textureCoordinate).rgb;
vec3 leftTextureColor = texture2D(inputImageTexture, leftTextureCoordinate).rgb;
vec3 rightTextureColor = texture2D(inputImageTexture, rightTextureCoordinate).rgb;
vec3 topTextureColor = texture2D(inputImageTexture, topTextureCoordinate).rgb;
vec3 bottomTextureColor = texture2D(inputImageTexture, bottomTextureCoordinate).rgb;
gl_FragColor = vec4((textureColor * centerMultiplier - (leftTextureColor * edgeMultiplier + rightTextureColor * edgeMultiplier + topTextureColor * edgeMultiplier + bottomTextureColor * edgeMultiplier)), texture2D(inputImageTexture, bottomTextureCoordinate).w);
}
);
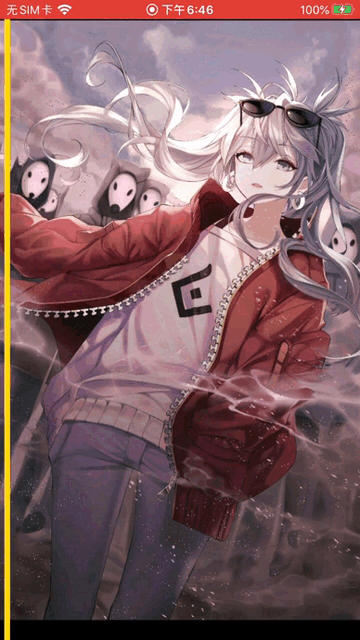
#endif二.效果演示
使用GPUImageSharpenFilter** 处理图片示例**,原图:

三.源码下载
OpenGL ES Demo 下载地址 : IOS – OpenGL ES 设置图像滤镜 GPUImageSharpenFilter
原创声明:本文系作者授权腾讯云开发者社区发表,未经许可,不得转载。
如有侵权,请联系 cloudcommunity@tencent.com 删除。
原创声明:本文系作者授权腾讯云开发者社区发表,未经许可,不得转载。
如有侵权,请联系 cloudcommunity@tencent.com 删除。
评论
登录后参与评论
推荐阅读
目录
腾讯云开发者

Copyright © 2013 - 2026 Tencent Cloud. All Rights Reserved. 腾讯云 版权所有
深圳市腾讯计算机系统有限公司 ICP备案/许可证号:粤B2-20090059 ![]() 粤公网安备44030502008569号
粤公网安备44030502008569号
腾讯云计算(北京)有限责任公司 京ICP证150476号 | 京ICP备11018762号